The CLI lineage harvester is deprecated and reaches its End of Life on July 31, 2026. To continue generating technical lineage for selected data sources, any Collibra Data Lineage customers that are still using the CLI lineage harvester need to transition to technical lineage via Edge. before this date.
Scenario
In this use case, you'll migrate the technical lineage of an Oracle data source, using an Amazon Web Services (AWS) connection. You'll decommission the existing CLI harvester configuration, provision equivalent Oracle Edge capability, and resolve common "useCollibraSystemName" configuration mismatches that result in synchronization failures.
The steps in this use case are specific to the latest Collibra UI.
Steps overview
| # | Step | Description |
|---|---|---|
| 1 | Review the preflight checks. | Key considerations to help ensure successful integration, including required Edge, technical lineage, and data source-specific permissions, network requirements and more. |
| 2 | Copy the source ID and decommission the CLI lineage harvester. |
Take note of the source ID of the data source for which you want to migrate lineage. Decommissioning the CLI harvester eliminates the risk that both the CLI harvester and Edge attempt to update the same lineage batch. |
| 3 | Prepare and store your SQL files in an AWS S3 bucket. |
You need to provide SQL files that include your SQL queries. Collibra Data Lineage processes the metadata based on your queries to create the technical lineage. The focus of this use case is an AWS S3 bucket. |
| 4 |
Create an AWS connection. |
You need to create an AWS connection to the AWS S3 bucket in which your SQL files are stored. |
| 5 |
Add the Technical Lineage for SqlDirectory (Cloud). |
Add the technical lineage capability to your Edge or Collibra Cloud site. The capability allows the lineage harvester to retrieve data from AWS S3 bucket. |
| 6 | Synchronize your technical lineage. |
You can synchronize your technical lineage manually or automatically by adding a synchronization schedule. In this use case, you'll synchronize manually. |
| 7 | Cleanup and deletion: Delete the technical lineage of a data source. |
Use the technical lineage admin "ignore sources" option to remove stale source IDs that cause "useCollibraSystemName" errors or persist as gray nodes in the lineage viewer. |
1. Review the preflight checks
To ensure successful metadata ingestion and lineage generation, complete the following preflight checks.
In your Oracle environment
- all_tab_cols
- all_col_comments
- all_objects
- ALL_DB_LINKS
- all_mviews
- all_source
- all_synonyms
- all_views
all_source table to retrieve Package bodies. However, this requires the EXECUTE privilege. As an alternative, you can direct the harvester to query the dba_source table, which requires the SELECT_CATALOG_ROLE role. To do so, you need to:- If via Edge: Replace
all_sourcebydba_sourcein the Other Queries field in your Edge capability. - If via the CLI lineage harvester: Replace
all_sourcebydba_sourcein the file ./sql/oracle/queries.sql, which is included in the ZIP file when you download the lineage harvester.
In your Collibra environment
- Technical lineage via Edge is enabled in your Collibra environment.
-
You
- The Edge site status must be Healthy.
- You've registered the data source via Edge.
- Edge can connect to all Collibra Data Lineage service instances in your geographic location.
Collibra permissions
You can connect to Collibra Data Lineage by using the basic or OAuth authentication method. The following permissions are required only if you use the basic authentication method.
- A global role with the following global permissions:
- Data Stewardship Manager
- Manage all resources
- System administration
- Technical lineage
- A resource role with the following resource permissions on the community level in which you created the domain:
- Asset > Add
- Attribute > Add
- Domain > Add
- Attachment > Add
To create the Amazon Web Services (AWS) connection and add the Edge capability:
- You have a global role with the Product Rights > System administration global permission.
- You have a global role that has the Manage connections and capabilities global permission.
To create a Technical Lineage Admin connection:
- You have a global role with the Product Rights > System administration global permission.
- You have a global role that has the Manage Edge sites global permission.
- You have a global role that has the Manage connections and capabilities global permission.
To synchronize technical lineage:
- A global role that has the following global permission:
- Catalog, for example Catalog Author
- View Edge connections and capabilities
- A resource role with Configure external system resource permission, for example Owner.
2. Copy the source ID and decommission the CLI lineage harvester
- Open your existing lineage harvester configuration file.
- Take note of the value of the
idproperty for the data source you want to migrate. For example,id: "marketing_snowflake_prod". You'll need this when you add the Edge capability. - Remove the entire section for that data source from the lineage harvester configuration file. For example:
{
	"dialect" : "oracle",
	"id" : "informatica_source",
	"type" : "ExternalDirectory",
	"dirType" : "powercenter",
	"path" : "/path/to/the/informatica/folder/",
	"mask" : "*",
	"recursive" : false,
	"deleteRawMetadataAfterProcessing": false
}
3. Prepare your Oracle SQL files for cloud storage
-
Create your SQL files. Ensure that the following requirements are met for the SQL files:
- The SQL files must be UTF-8 encoded.
- The SQL files can't have white spaces in their names.
- For better ingestion, include one SQL statement in one SQL file.
- SQL files that contain Data Definition Language (DDL) statements must be processed before SQL files that contain Data Manipulation Language (DML) statements.
For the data sources that are listed in Supported SQL statements , Collibra Data lineage automatically detects DDL statements, regardless of the SQL file names.
For other JDBC data sources, Collibra Data Lineage processes SQL files in alphanumeric order. To ensure that DDL statements are processed first, name SQL files that contain DDL statements so they are before files that contain DML statements. - The database and schema names in the SQL statements in your SQL files take precedence over the values that you provide for the Database and Schema fields in the technical lineage for SqlDirectory capability. If your SQL statements contain database and schema names, Collibra Data Lineage uses them for stitching. If your SQL statements do not contain database and schema names, Collibra Data Lineage uses the values of the Database and Schema fields in the capability for stitching. For more information, go to Add a technical lineage capability to your Edge site and Automatic stitching for technical lineage.
- For Collibra Data Lineage to correctly highlight the transformation logic in the Source code pane, we strongly recommend that your SQL files have Unix line endings. Non-Unix line endings, for example Carriage Return (CR) and Line Feed (LF) line breaks, do not influence the extracted lineage and can result in incorrect highlighting.
For more information, go to Supported SQL syntax.
- Store the SQL files in your AWS S3 bucket.
4. Create an AWS connection
If you use a vault to add your data source information to your Edge site connection, go to Oracle: Create an AWS connection for complete information.
- Open a site.
-
On the main toolbar, click
 →
→
 Settings.
The Settings page opens. -
In the tab pane, click Edge.
The Sites tab opens and shows a table with an overview of your sites. - In the table, click the name of the site whose status is Healthy.
The site page opens.
-
On the main toolbar, click
- In the Connections section, click Create connection.
The Create connection page appears. - Select the AWS connection to connect to Amazon S3.
- Enter the required information.
Field Description Required Available for vaults? Name The name of the Edge or Collibra Cloud site AWS connection.
 Yes
Yes No
No
Description The description of the connection.
No
No
Vault The vault where you store your data source values. No
No
Authentication type The type of authentication you use. The possible values are IAM and EC2.
Use type EC2 AWS if you want to connect to an AWS EC2 instance that is configured with role based authentication. For more details, go to Prepare S3 for Edge.
Yes
No
Access Key ID The access key ID of the programmatic AWS user.
Yes for IAM authentication type. Yes
Secret Access Key The secret access key of the programmatic AWS user.
Yes for IAM authentication type. Yes
- Click Create.
The connection is added to the Edge or Collibra Cloud site.
The fields become read-only.
5. Add the Oracle capability for Cloud Storage connections
- Open a site.
-
On the main toolbar, click
→
Settings.
The Settings page opens. -
In the tab pane, click Edge.
The Sites tab opens and shows a table with an overview of your sites. - In the table, click the name of the site whose status is Healthy.
The site page opens.
-
On the main toolbar, click
- In the Capabilities section, click Add capability.
The Add capability page appears. - Select the Technical Lineage for SqlDirectory (Cloud) capability.
- Enter the required information.
Field Description Required? Name
The name of the capability.
Yes
Description
The description of the capability.
Yes
Source ID
Enter the source ID that you copied in step 1. For this use case:
marketing_snowflake_prod. Yes
TechLin Admin Connection (in preview) If you want to use the OAuth authentication type to connect to the Collibra Data Lineage service instances, you have to create a Technical Lineage Admin Edge or Collibra Cloud site connection and select the OAuth authentication type. Then, in this field, specify the name of the Technical Lineage Admin connection.
For more information about the authentication types, go to Create a Technical Lineage Admin connection.
No
Cloud Connection
The name of the AWS connection that you created
Yes
Cloud Storage Bucket/Container The name of the bucket or container in the cloud-based storage system. Do not include the protocol or prefix, for example don't include s3:// or gs://.
Yes
Cloud Storage Region The AWS S3 cloud storage region.
No
Azure Cloud Storage Account Not applicable for this use case.
No
Cloud Storage Path The path to the folder (in the container or bucket) that contains the files.
No
Mask The pattern of the file names in the directory. By default, the value is
*. No
Dialect The dialect of the database. In this use case:
oracle Yes
Collibra System Name
Enter the name of your System asset in Data Catalog. For successful stitching, the names must exactly match.
Important Be sure to read the following section The "useCollibraSystemName" trap.
Yes
Database The name of your database, which is also the name of your Database asset in Data Catalog.
Note The database and schema names in the SQL statements in your SQL files take precedence over the values that you provide for the Database and Schema fields in the technical lineage for SqlDirectory capability. If your SQL statements contain database and schema names, Collibra Data Lineage uses them for stitching. If your SQL statements do not contain database and schema names, Collibra Data Lineage uses the values of the Database and Schema fields in the capability for stitching. Yes
Schema The name of the default schema, if not specified in the data source itself. This corresponds to the name of your Schema asset.
Note The database and schema names in the SQL statements in your SQL files take precedence over the values that you provide for the Database and Schema fields in the technical lineage for SqlDirectory capability. If your SQL statements contain database and schema names, Collibra Data Lineage uses them for stitching. If your SQL statements do not contain database and schema names, Collibra Data Lineage uses the values of the Database and Schema fields in the capability for stitching. Yes
Database Link Mapping Not applicable for this use case.
No
Property Use this section to define custom parameters for technical lineage. Click Add property to add a parameter.
Available properties:Type Value Type Name Descriptions Example value Text
Plaintext
httpTimeoutSets the HTTP timeout duration, in seconds. You can enter a value in the range of 1 to 3599. The default value is 15.
15Properties for Collibra Platform for Government customersType Value type Name Description Example value Text
Plaintext
techlinHostThis is the URL of the Collibra Data Lineage service instance to which you want to upload metadata.
techlin-europe-west1.collibra.comText
Secret
techlinKeyThis is the unique API key to connect to a Collibra Data Lineage service instance.
Specify a unique user key for each Collibra environment. If you're not sure what your user key is, contact your Collibra Collibra Account Team.
<your-techlin-key> Yes for US government customers.
Dependent On Sources
Not applicable for this use case.
No
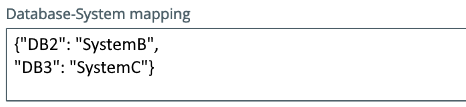
Database-System mapping This optional
More information and example configurationLet’s say you use the
Now let’s say that you have a SQL statement that selects data from a database DB2 (which is in SystemB) and inserts the data in database DB3 (which is part of SystemC). Both of these databases will be associated with SystemA, and both will appear under SystemA in the Browse tab pane. Therefore, stitching fails and duplicate databases might appear.
To resolve this issue and obtain stitching, you can use this
 No
No
Delete Raw Metadata After Processing
Technical lineage via Edge harvests raw metadata from specified data sources and uploads it in a ZIP file to a Collibra Data Lineage service instance. This option indicates whether the raw metadata should be deleted from the Collibra Data Lineage service instance after the metadata that is targeted for ingestion in Data Catalog is processed.
Select this option to indicate that the raw source metadata is deleted after processing.
Clear the checkbox to keep the raw source metadata after processing. In this case, it is stored in the Collibra infrastructure.
No
Analyze Only (Deprecated)
Important This option is deprecated and will be removed in a future version of Collibra. We recommend that you no longer use it. The mandatory Processing Level setting, below, replaces this option.- The "Analyze" option in the Processing Level setting is the equivalent of selecting the Analyze Only option.
- The "Sync" option in the Processing Level setting is the equivalent of clearing the Analyze Only option.
No
Select Sync to immediately synchronize the lineage.
Yes
Active
The option determines whether to include or remove the technical lineage of the data source.
Select this option to include the technical lineage of this data source.
Yes
- Click Add.
The capability is added to the Edge or Collibra Cloud site.
The fields become read-only.

6. Synchronize Oracle lineage Cloud Storage connection
You can synchronize your technical lineage manually or automatically by adding a synchronization schedule. In this use case, you'll synchronize manually.
-
On the main toolbar, click
→
 Catalog.
The Catalog homepage opens. -
In the tab bar, click
Integrations.
The Integrations page opens. - Click the
Integration Configuration tab.
- Find the connection that you used when you added the technical lineage capability, and click the link in the Capabilities column. If multiple capabilities exist for the connection, expand them to find your capability.
The capability configuration page opens. - On the Synchronize Configuration tab pane, click Synchronize.A notification indicates synchronization has started.The synchronization job is started. The lineage is ingested based on the configuration provided.
7. Cleanup and deletion: Delete the technical lineage of a data source
If necessary, remove stale source IDs that cause "useCollibraSystemName" errors or persist as gray nodes in the lineage viewer. This is the most critical pain point for users.
The "useCollibraSystemName" trap
A common source of synchronization failure is "Collibra system name" setting mismatches. This happens if the value of the useCollibraSystemName property in your lineage harvester configuration file does not match with the Edge setting in Collibra Console.
Specifically:
-
In your lineage harvester configuration file: the
useCollibraSystemNameproperty must be set totrueorfalse. - In Collibra Console, the Collibra system name must match the value of the
useCollibraSystemNameproperties in your lineage harvester configuration file, either True or False.
For information on this Collibra Console setting, go to Enable technical lineage via Edge.
The useCollibraSystemName property in your lineage harvester configuration file and the Collibra system name setting in Collibra Console determine whether the System name is included in the full path - and therefore the full names - of assets. If the property and field values do not match, stitching cannot be achieved.
Important If you change the values either in your lineage harvester configuration file or in Collibra Console to avoid a mismatch, you must remove the old source ID to clear the cached configuration. Then synchronize as a fresh data source.
Clear the Active checkbox
Ensure that the Active checkbox in the relevant technical lineageEdge capability is cleared.
- Open an Edge or Collibra Cloud site.
-
On the main toolbar, click
→
Settings.
The Settings page opens. -
In the tab pane, click Edge.
The Sites tab opens and shows a table with an overview of your sites. - In the Edge or Collibra Cloud site overview, click the name of the Edge or Collibra Cloud site to which you added the technical lineage capability for the data source.
The Edge or Collibra Cloud site page appears.
-
On the main toolbar, click
- In the Capabilities section, locate and click the technical lineage capability for the data source you want to delete.
- Clear the Active checkbox.
- Click Save.
The capability is updated.
Create a Technical Lineage Admin connection
- Open a site.
-
On the main toolbar, click
→
Settings.
The Settings page opens. -
In the tab pane, click Edge.
The Sites tab opens and shows a table with an overview of your sites. - In the site overview, click the name of a site.
The site page appears.
-
On the main toolbar, click
- In the Connections section, click Create Connection.
The Create Connection dialog box appears. - Select the Technical Lineage Admin connection.
-
Enter the connection information.
- Basic Authentication
If you choose this method, ignore the rest of the fields. - OAuth
If you choose this method, you must use the following fields to provide a client ID and client secret. This authentication method is recommended for enhanced security.Important OAuth authentication is not yet available for Collibra Platform for Government customers. - In Collibra Settings, click OAuth Applications.
- Click Register New Application.
The Register New Application dialog box appears. - Enter the following information:
- For the Application Type, select Platform.
- Provide a name for the application.
- In the Integration Type drop-down list, select Technical Lineage.
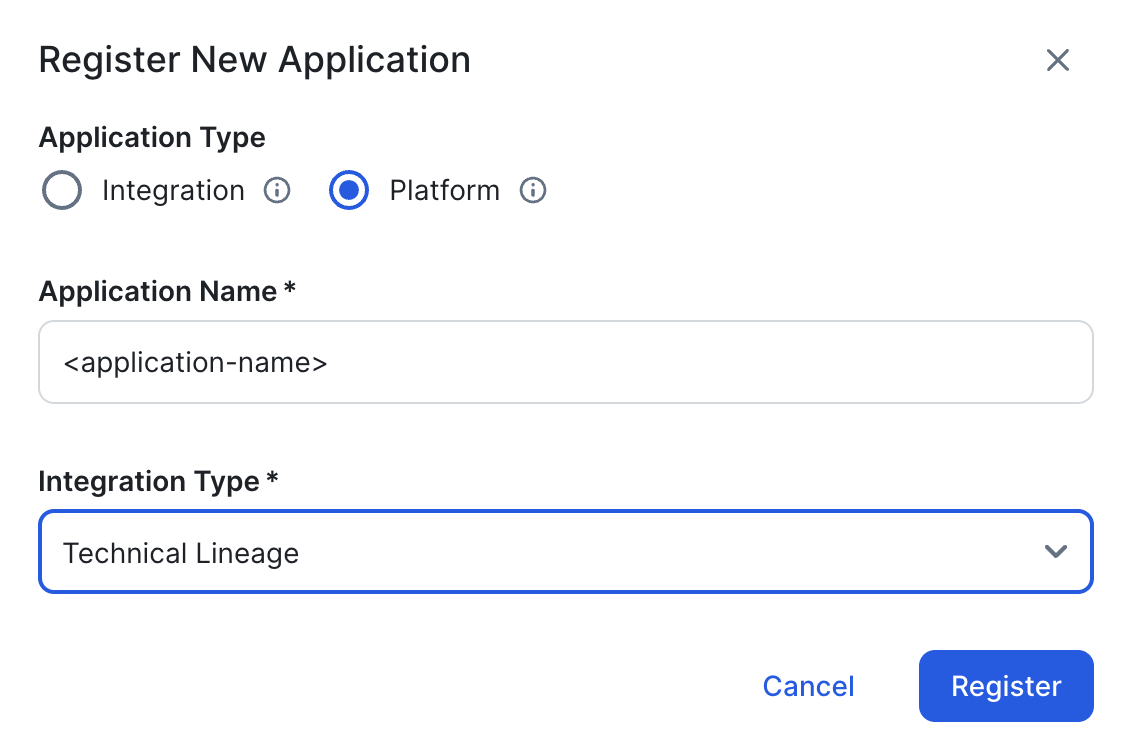
- Click Register.
-
Copy and safely store the Client ID and Client Secret.
Important This is the only time you are able to see the client secret.
- In Collibra Settings, click OAuth Applications.
- Click Register New Application.
The Register New Application dialog box appears. - Enter the following information:
- For the Application Type, select Platform.
- Provide a name for the application.
- In the Integration Type drop-down list, select Technical Lineage.
- Click Register.
-
Copy and safely store the Client ID and Client Secret.
Important This is the only time you are able to see the client secret.
- Click Create.
| Field | Description | Required |
|---|---|---|
| Name |
A name for the Edge connection. |
|
| Description |
A description of the connection. |
|
|
Authentication Type |
The authentication method you use to connect to Collibra Data Lineage: |
|
|
Client ID |
Your client ID for OAuth authentication. How to obtain a client ID and client secret
For complete information, go to OAuth Applications. |
|
|
Client Secret |
Your client secret for OAuth authentication. How to obtain a client ID and client secret
For complete information, go to OAuth Applications. |
. |
Add a Technical Lineage Admin capability to your Edge or Collibra Cloud site
- Open a site.
-
On the main toolbar, click
→
Settings.
The Settings page opens. -
In the tab pane, click Edge.
The Sites tab opens and shows a table with an overview of your sites. - In the table, click the name of the site whose status is Healthy.
The site page opens.
-
On the main toolbar, click
- Select the relevant capability template:
Technical Lineage Admin. - Enter the required information.
Field Description Required? Name
The name of the capability.
Yes
Description
The description of the capability.
Yes
Admin connection
The name of the Edge connection you created in the previous step.
Yes
Property Use this section to define custom parameters for technical lineage. Click Add property to add a parameter.
Available properties:Type Value Type Name Descriptions Example value Text
Plaintext
httpTimeoutSets the HTTP timeout duration, in seconds. You can enter a value in the range of 1 to 3599. The default value is 15.
15Properties for Collibra Platform for Government customersType Value type Name Description Example value Text
Plaintext
techlinHostThis is the URL of the Collibra Data Lineage service instance to which you want to upload metadata.
techlin-europe-west1.collibra.comText
Secret
techlinKeyThis is the unique API key to connect to a Collibra Data Lineage service instance.
Specify a unique user key for each Collibra environment. If you're not sure what your user key is, contact your Collibra Collibra Account Team.
<your-techlin-key>Yes for US government customers.Debug
Select False.
No
Log level
Leave this set to No logging.
No
- Click Create.
The capability is added to the Edge or Collibra Cloud site.
The fields become read-only.
Run the "Ignore source" option in Data Catalog
To use the Ignore sources option:
- Your metadata must be refreshed. You can either wait for the next scheduled synchronization to run, or you can edit the Integration configuration data refresh schedule setting in Collibra Console so that the refresh is done sooner.
- If you edit the Integration configuration data refresh schedule setting, you must restart Collibra.
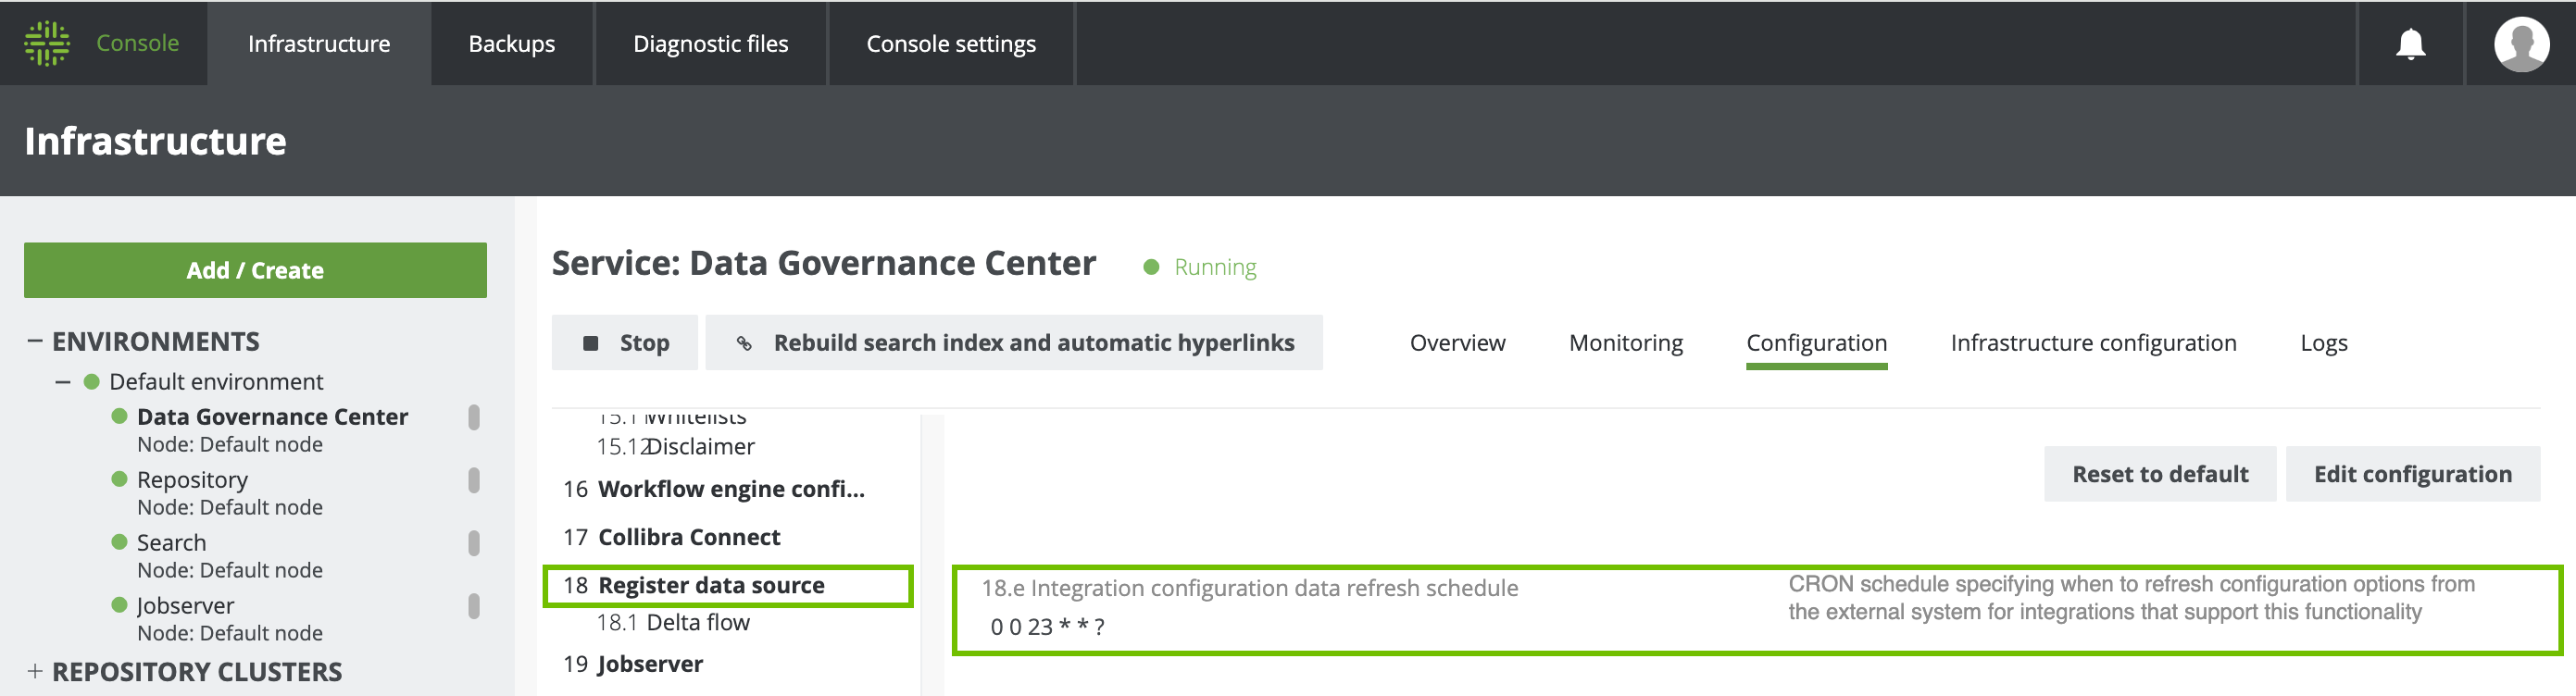
If you don't refresh your metadata (and restart Collibra, if necessary), an error is shown on the Integration Configuration tab.
For each source that you want to ignore, ensure that the Active checkbox in the respective technical lineage Edge capability is cleared.
-
On the main toolbar, click
→
Catalog.
The Catalog homepage opens. -
In the tab bar, click
Integrations.
The Integrations page opens. - Click the
Integration Configuration tab.
- Find the connection that you used when you added the technical lineage capability, and click the link in the Capabilities column. If multiple capabilities exist for the connection, expand them to find your capability.
The capability configuration page opens. - On the Synchronize Configuration section, click Edit Configuration.
- In the Admin command drop-down list, select Ignore sources.
- In the Sources drop-down list, select the source or sources you want excluded from the technical lineage.
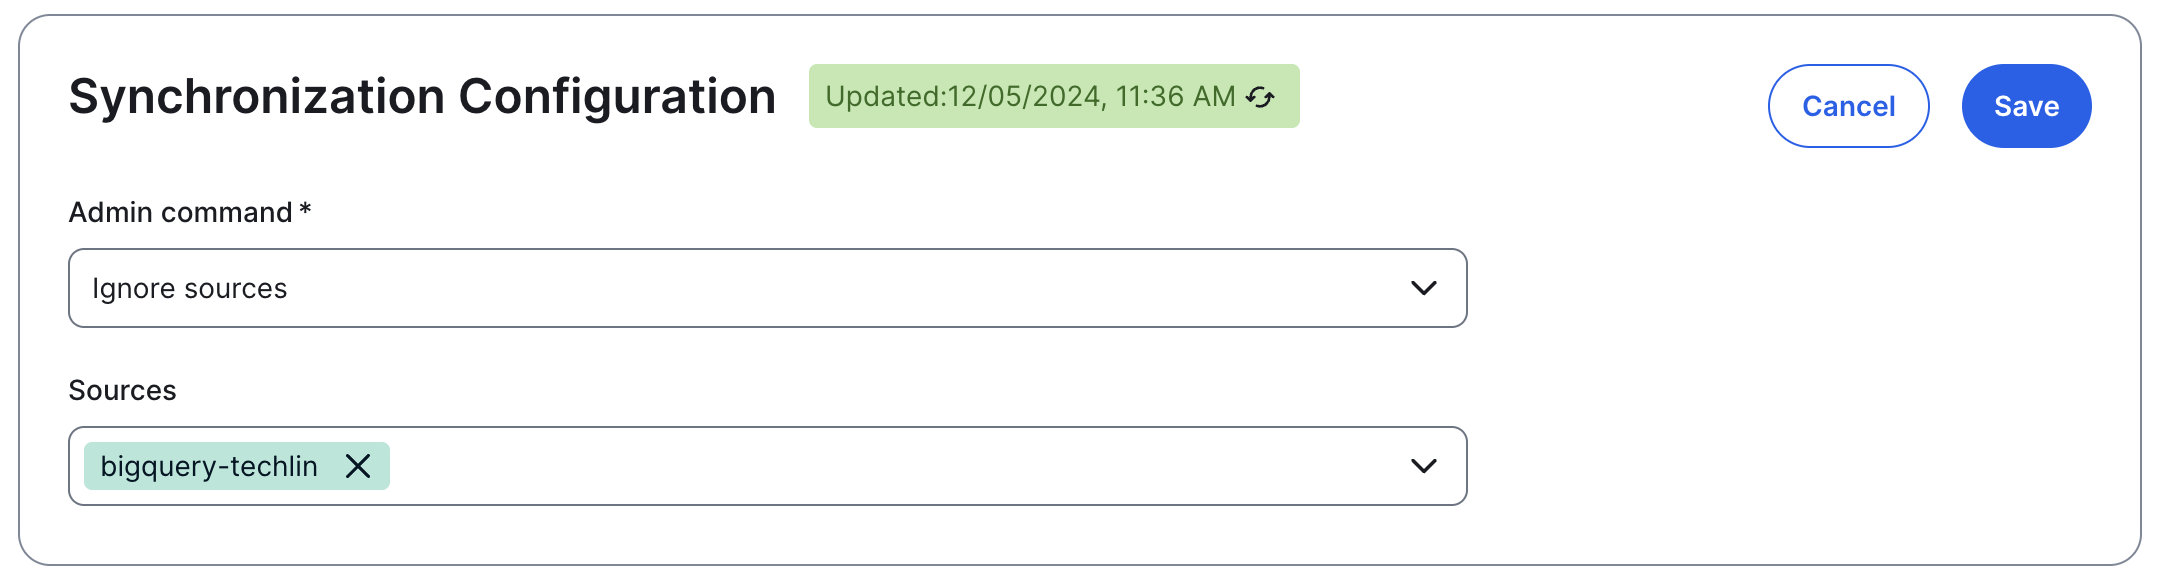
- Click Save.
- In the Synchronize Configuration section, click Synchronize.
When synchronization is complete, the technical lineage of the data source is deleted.
View the synchronization results for the "Ignore sources' job
- Open the Activities list.
-
In the row containing the job, click Result.
The Synchronization Results dialog box appears.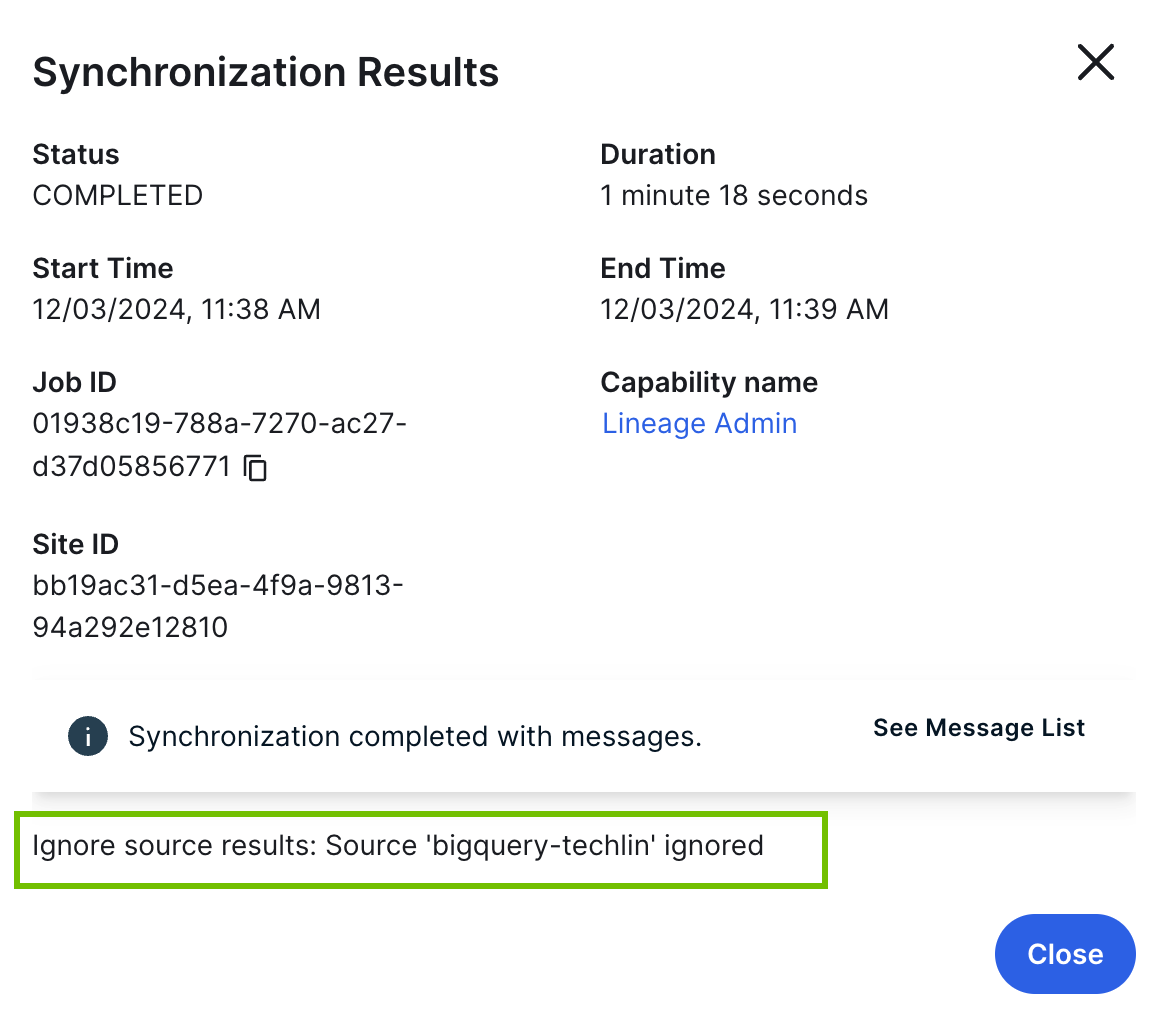
Run the "Sync" option in Data Catalog, for any other data source
This step ensures that the technical lineage is regenerated. You don't have to create a new Edge connection or add another capability. For the data source that you sync, ensure that:
- The Active option is selected in the Edge capability.
- The Processing Level setting is set to Sync.
After a successful synchronization, the deleted data source is removed from the technical lineage graph.