If the Automatic Data Classification process cannot detect a data class for a column, you can classify the column yourself.
- If you are using the Cloud Data Classification Platform, your new data class will be used to improve its future predictive capabilities.
- If you are using Edge, the user-defined classes are only stored. You can use them to manually assign the data class to a column. The user-defined classes are not used to retrain the classification model. See About profiling via Edge.
Prerequisites
- You have configured Automatic Data Classification via the Cloud Data Classification Platform (for Jobserver) or via Edge.
- You have the correct permissions to classify tables and columns.
- You have registered a data source via Jobserver or via Edge.
When you use Jobserver, ensure to:- Store Data Profile.
- Store Sample Data. The more sample data, the better the data class predictions.
Note For Jobserver, all sample data and profiling data is stored in the Collibra cloud repository. - Data Catalog experience is enabled in the DGC service configuration.
This will give you access to the improved Schema asset page.
Create a user-defined data class via Guided Stewardship
See Add data classes.
Create a user-defined data class via the Table asset page
- Find the table that contains the columns to classify.
- Navigate to the Columns section.
- If not yet available, add the Data Classification column to the table.
- Double-click in the Data Classification column.
The list with existing data classes appears. - Enter the new data class name and press Enter.Note
- Data classes are case-sensitive and can contain spaces.
- You can add more data classes if applicable but avoid it as much as possible.
- Click outside the field.
The new data class is added and automatically accepted.
Create a user-defined data class via the Column asset page
- Find the column you want to classify.
- In the At a Glance section, click the Data Classification field.
Tip To open the At a Glance section, click the information icon.
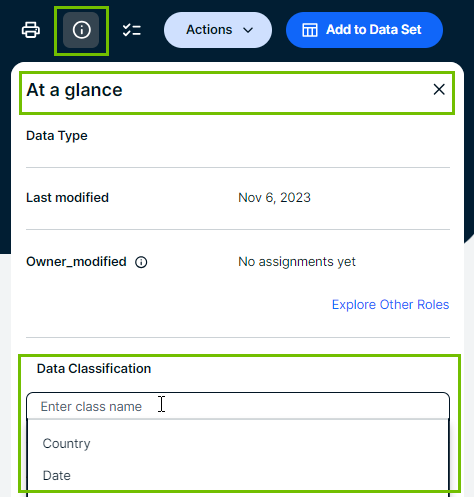
- Enter the new data class name and press Enter.Note
- Data classes are case-sensitive and can contain spaces.
- You can add more data classes if applicable but avoid it as much as possible.
- Click Save.
The new data class is added and automatically accepted.