Synchronizing Sigma is the process of importing and updating metadata from your Sigma environment into Collibra Data Catalog. This operation uses the Sigma capability (configured in Edge or Collibra Cloud site) to fetch metadata for workspaces, dashboards, datasets, data elements, and data connections, and automatically create or update them as assets in the Collibra Catalog.
You can synchronize manually or on a schedule.
Before you begin
- You have created a connection to Sigma in your Edge or Collibra Cloud site.
- You have added the Sigma capability for the connection.
- The Edge site status is Healthy.
- The Sigma API token or service account credentials are valid.
Requirements and permissions
- You have a global role with the Catalog global permission, for example, Catalog Author.
- You have a global role with the View Edge connections and capabilities global permission, for example, Edge integration engineer.
- You have a resource role with the Configure external system resource permission, for example, Owner.
Steps
-
On the main toolbar, click
 →
→
 Catalog.
The Catalog homepage opens. -
In the tab bar, click Integrations.
The Integrations page opens. - Click the Integration Configuration tab.
- Locate the Sigma connection that you used when you added the Sigma capability and click the link in the Capabilities column.
The synchronization configuration page opens. - In the Synchronization Configuration section, click Add Configuration.
-
Enter the required information.
Field Description Required Domain Select the domain in which Sigma assets should be created.
Important Choose a domain of type Technology Asset to ensure compatibility.
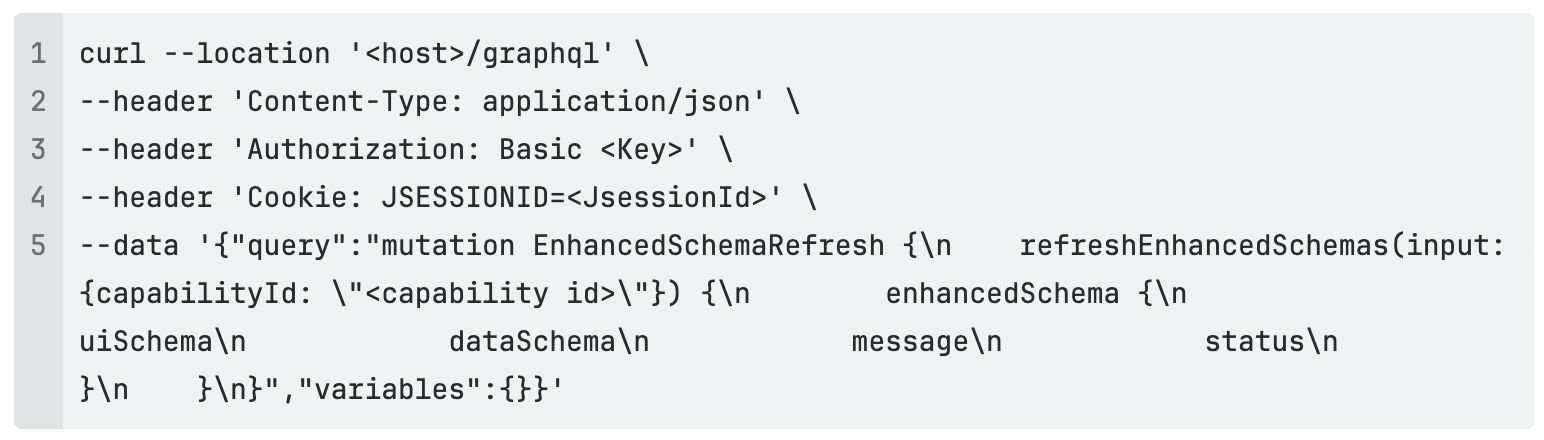
Yes Workspace Filter Add one or more Sigma workspaces to restrict synchronization to specific workspaces. If left blank, all available workspaces are synchronized. Filter by workspace ID or name when entering filters manually (no dropdown selection required) Yes To enable the dropdown manually, run the curl request below. Alternatively, you can reach out to Collibra Support to trigger it after installing the capability for the first time.
- Click Save.
- Click Synchronize.
A notification indicates the synchronization has started.
-
On the main toolbar, click
→
Catalog.
The Catalog homepage opens. -
In the tab bar, click Integrations.
The Integrations page opens. - Click the Integration Configuration tab.
- Locate the Sigma connection that you used when you added the Sigma capability and click the link in the Capabilities column.
The synchronization configuration page opens. - In the Synchronization Configuration section, click Add Configuration.
- In the relevant tab or tabs, as shown in the following image, configure the integration settings for the systems you want to include in the integration.
- Click Save.
- In the Synchronization Schedule section, click Add Schedule.
- Enter the information.
Field Description Repeat The interval when you want to synchronize automatically. The possible values are: Daily, Weekly, Monthly, and Cron expression. CronThe Quartz Cron expression that determines when the synchronization takes place.
This field is only visible if you select
Cron expressionin the Repeat field.EveryThe day on which you want to synchronize, for example, Sunday.
This field is only visible if you select
Weeklyin the Repeat field.Every firstThe day of the month on which you want to synchronize, for example, Tuesday.
This field is only visible if you select
Monthlyin the Repeat field.At
The time at which you want to synchronize automatically, for example, 14:00.
- You can only schedule on the hour. For example, you can add a synchronization schedule at 8:00, but not at 8:45.
- This field is only visible if you select
Daily,Weekly, orMonthlyin the Repeat field.
Time zone The time zone for the schedule. - Click Save
The synchronization job integrates the metadata.
After the synchronization:
- You can view a summary of the results from the Activities list.
- For metadata synchronization, the resulting assets get a relation to the System asset that you selected.
- For information on the integrated data, go to Integrated Sigma data.