Manage Page Editor Data Products widgets
The Data Products widgets help you track the health, activity, and status distributions of data products, data contracts, and data requests.
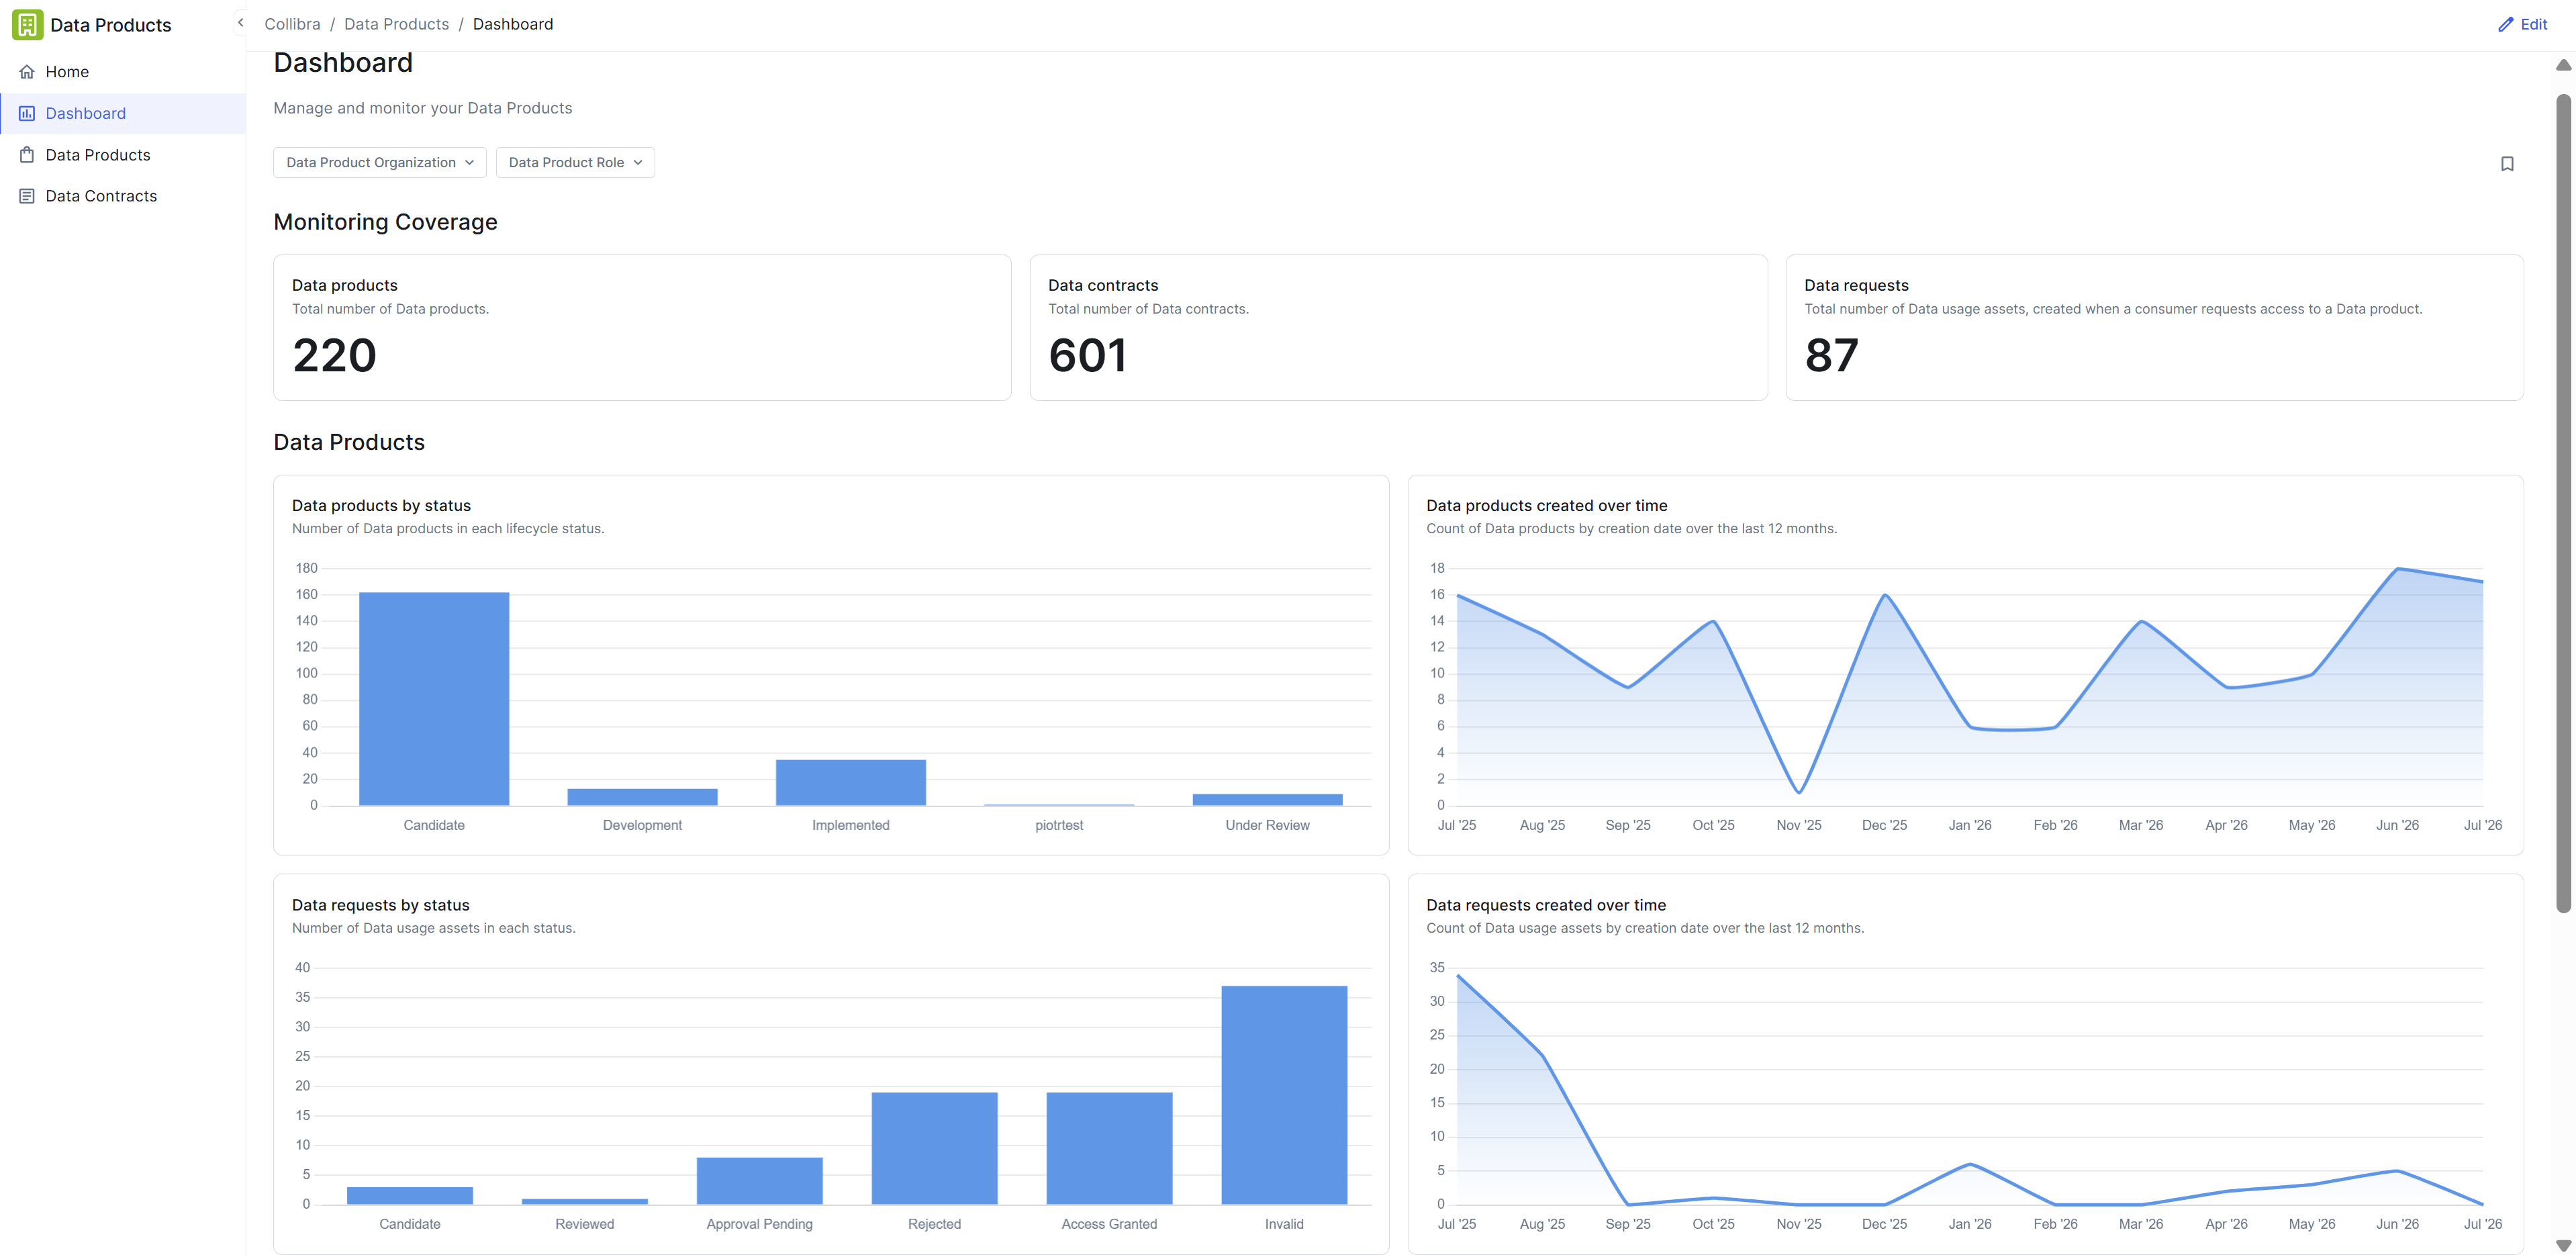
Data Products widgets
The following table contains the Data Products widgets.
| Widget | Description |
|---|---|
| Data contracts | Shows the number of Data Contract assets in your environment. |
| Data contracts created over time | Shows the number of Data Contract assets created over a period of time. |
| Data contracts by status | Shows the number of Data Contract assets grouped by status. |
| Data products | Shows the number of Data Product assets in your environment. |
| Data products created over time | Shows the number of Data Product assets created over a period of time. |
| Data products by status |
Shows the number of Data Product assets grouped by status. |
| Data requests |
Shows the number of Data Usage assets in your environment. |
| Data requests created over time | Shows the number of Data Usage assets created over a period of time. |
| Data requests by status | Shows the number of Data Usage assets grouped by status. |
Prerequisites
You have the required permissions to edit the product page or dashboard.
Steps
- Go to the Data Products dashboard:
- On the main toolbar, click
 >
Data Products.
>
Data Products. - In the left pane, click Dashboard.
- On the main toolbar, click
- Click Edit.
- Place the widget:
- If this is a new widget, under Widgets, drag and drop the widget to the desired row on the dashboard.
- If this is an existing widget, drag and drop the widget to the new position on the dashboard.
- Select the widget you want to configure.
- In the right pane, update the widget details:
- In the Title field, enter the name of the widget.
- In the Description field, enter a description of the widget.
- Optionally, in the Status field, select a status to filter the widget.
- Optionally, select
 above the component to copy and paste the component.
 - Optionally, select
 above the component to delete the component.
 - Click Publish to publish your changes.