Databricks connects to the Collibra MCP server through a Unity Catalog connection. Once connected, agents and the Databricks AI Playground can use Collibra's governed metadata tools. The recommended approach is for an administrator to create the connection once and share it with selected user groups.
Note The Databricks integration connects to a server in the Collibra Cloud environment, so it is not available for Collibra Platform for Government or Collibra Platform Self-Hosted (CPSH).
Before you begin
- You need admin privileges in Collibra to register an OAuth application.
- Each user signs in with their own Collibra credentials (OAuth 2.0, user to machine, per user).
- Have an administrator create the connection once and share it with the relevant user groups.
- Do not share a Client ID and Client Secret between individual users.
Step 1: Register an OAuth application in Collibra
This step requires admin privileges in Collibra.
- Go to Settings.
- Click OAuth applications.
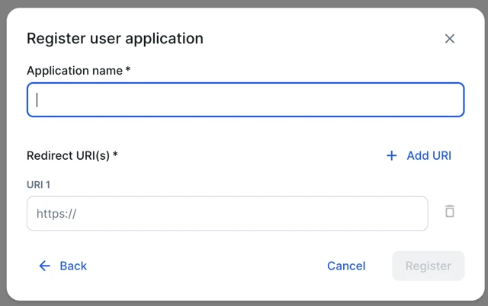
- Click Register user application.
- Enter an application name.
- Enter the redirect URI for Databricks:
https://<workspace-id>.cloud.databricks.com/login/oauth/http.html - Click Register.
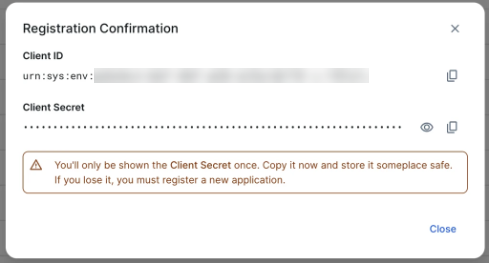
- Copy the Client ID and Client Secret. You need them to configure the connection in Databricks.
Step 2: Configure the connection in Databricks
You can set up the connection in two ways: through Databricks Marketplace or by creating an HTTP Connection (MCP) directly. Both create the same connection. Marketplace is the more guided option.
Option A: Databricks Marketplace (recommended)
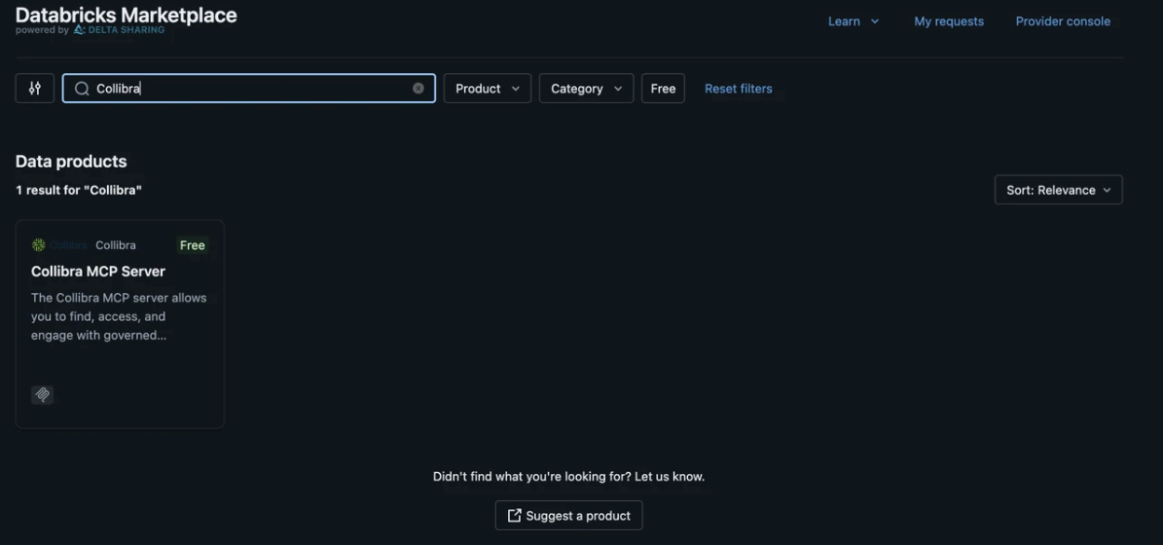
- Go to Marketplace and search for Collibra.
- Click Install.
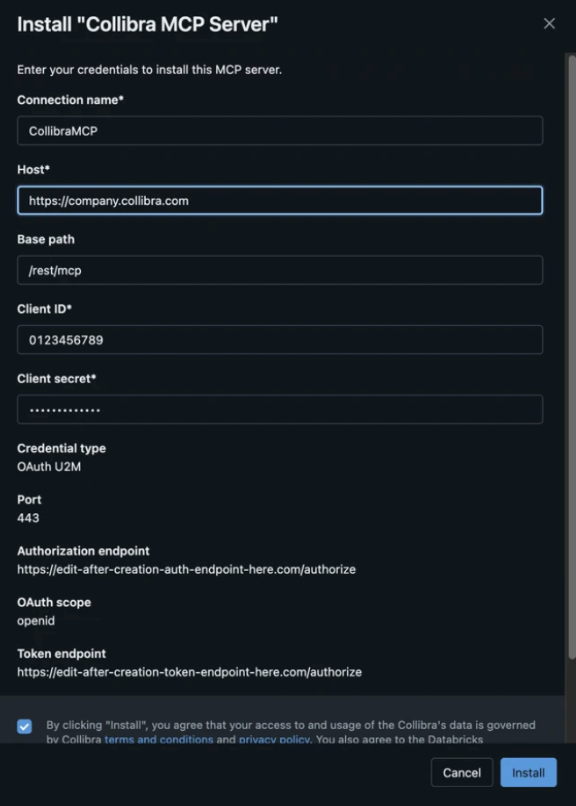
- Complete the form and click Install. Enter the Client ID and Client Secret from step 1. You set the authorization and token endpoints in the next step.
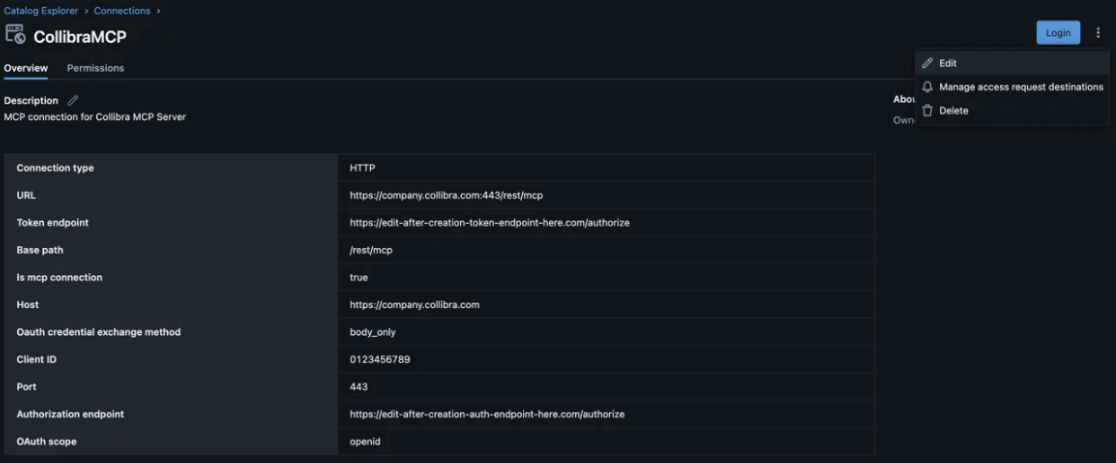
- Open the new Collibra MCP Server connection and click Edit.
- Update the endpoints, replacing
<instance>with your Collibra instance name:- Token endpoint:
https://<instance>.collibra.com/rest/oauth/v2/token - Authorization endpoint:
https://<instance>.collibra.com/rest/oauth/v2/authorize
- Token endpoint:
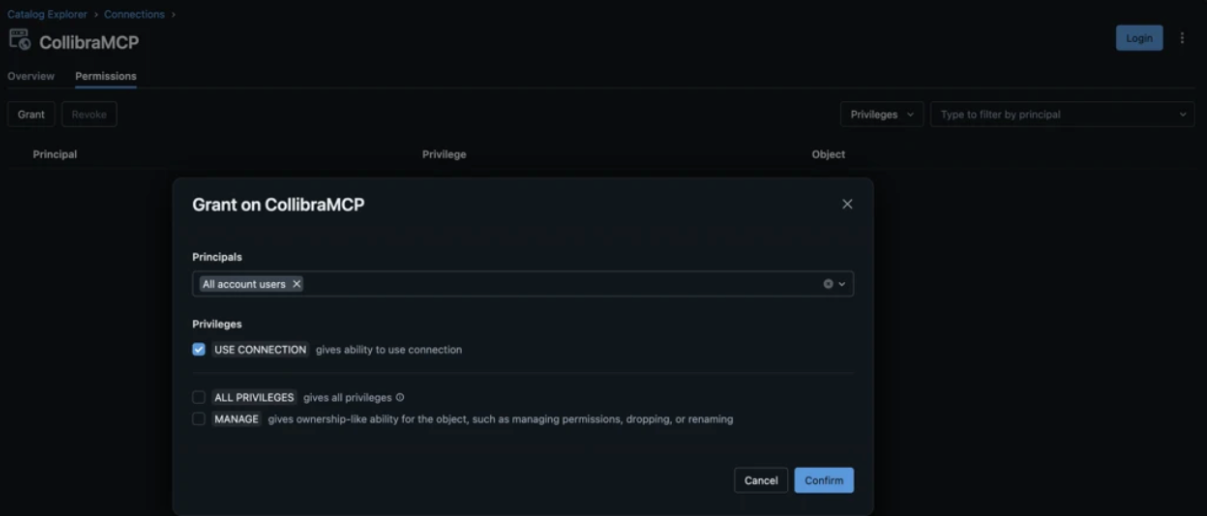
- Optional: open the Permissions tab and grant USE CONNECTION to all or selected users.

Option B: HTTP Connection (MCP)
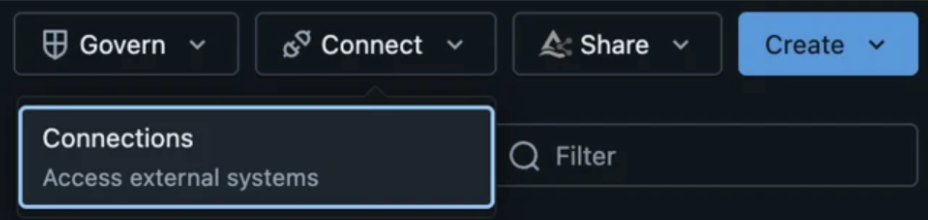
- Go to Catalog, then Connect, then Connections.
- Click Create connection.
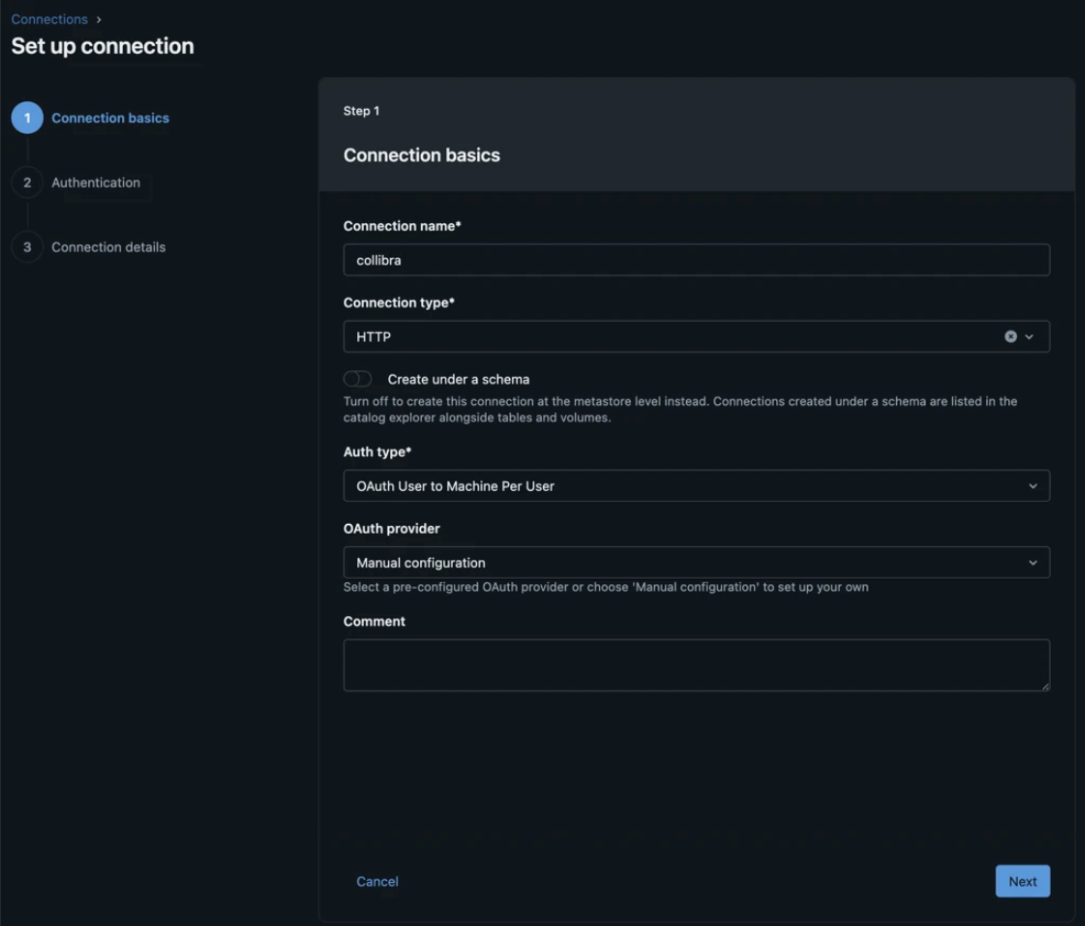
- Complete Connection basics:
- Connection name: your choice
- Connection type: HTTP
- Auth type: OAuth User to Machine per User
- OAuth provider: Manual
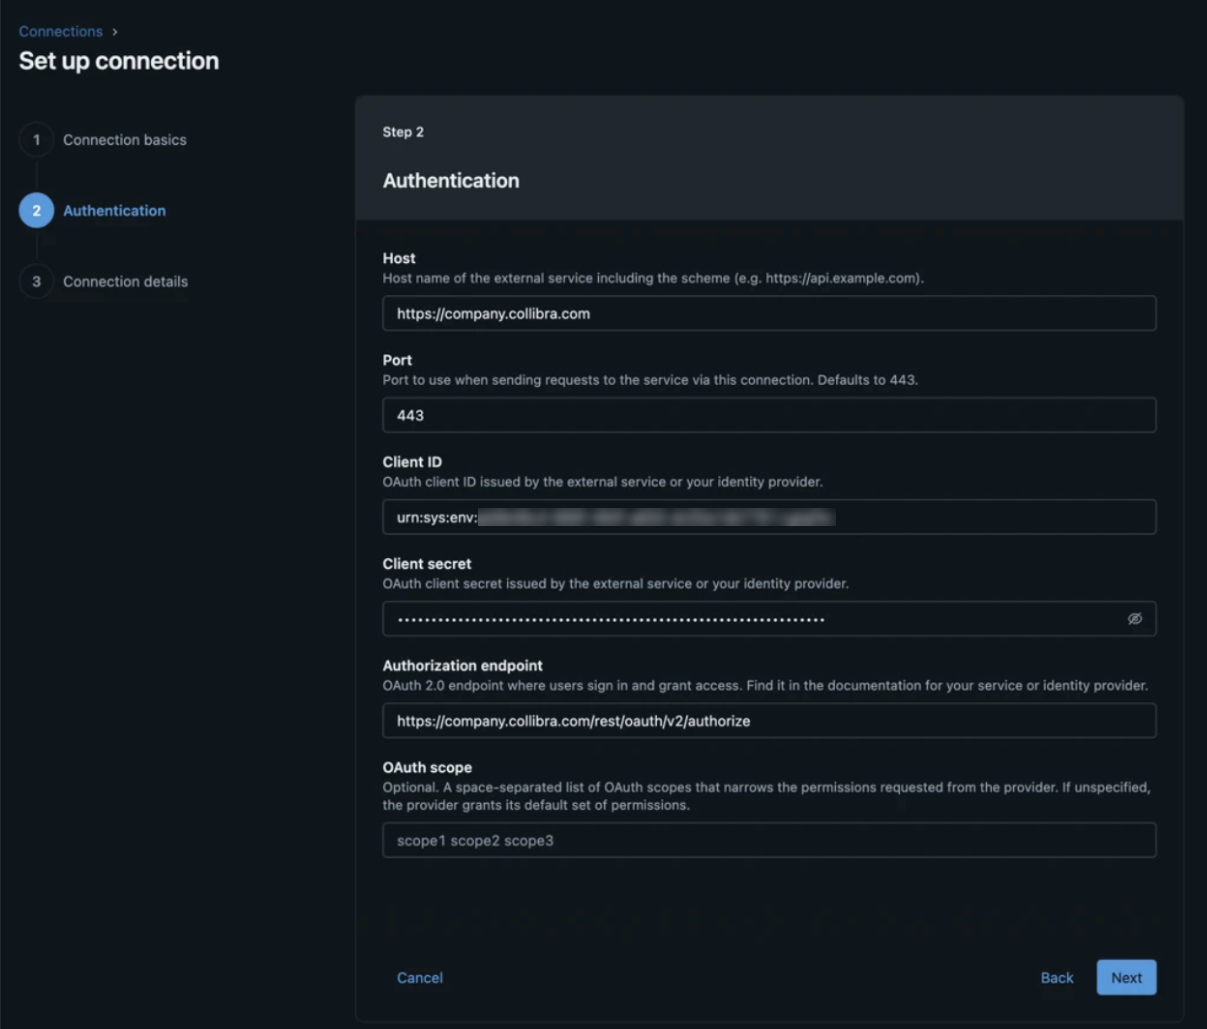
- Complete Authentication, replacing
<instance>with your Collibra instance name:- Host:
https://<instance>.collibra.com - Port: 443
- Client ID and Client Secret: from step 1
- Authorization endpoint:
https://<instance>.collibra.com/rest/oauth/v2/authorize - OAuth scope: leave empty
- Host:
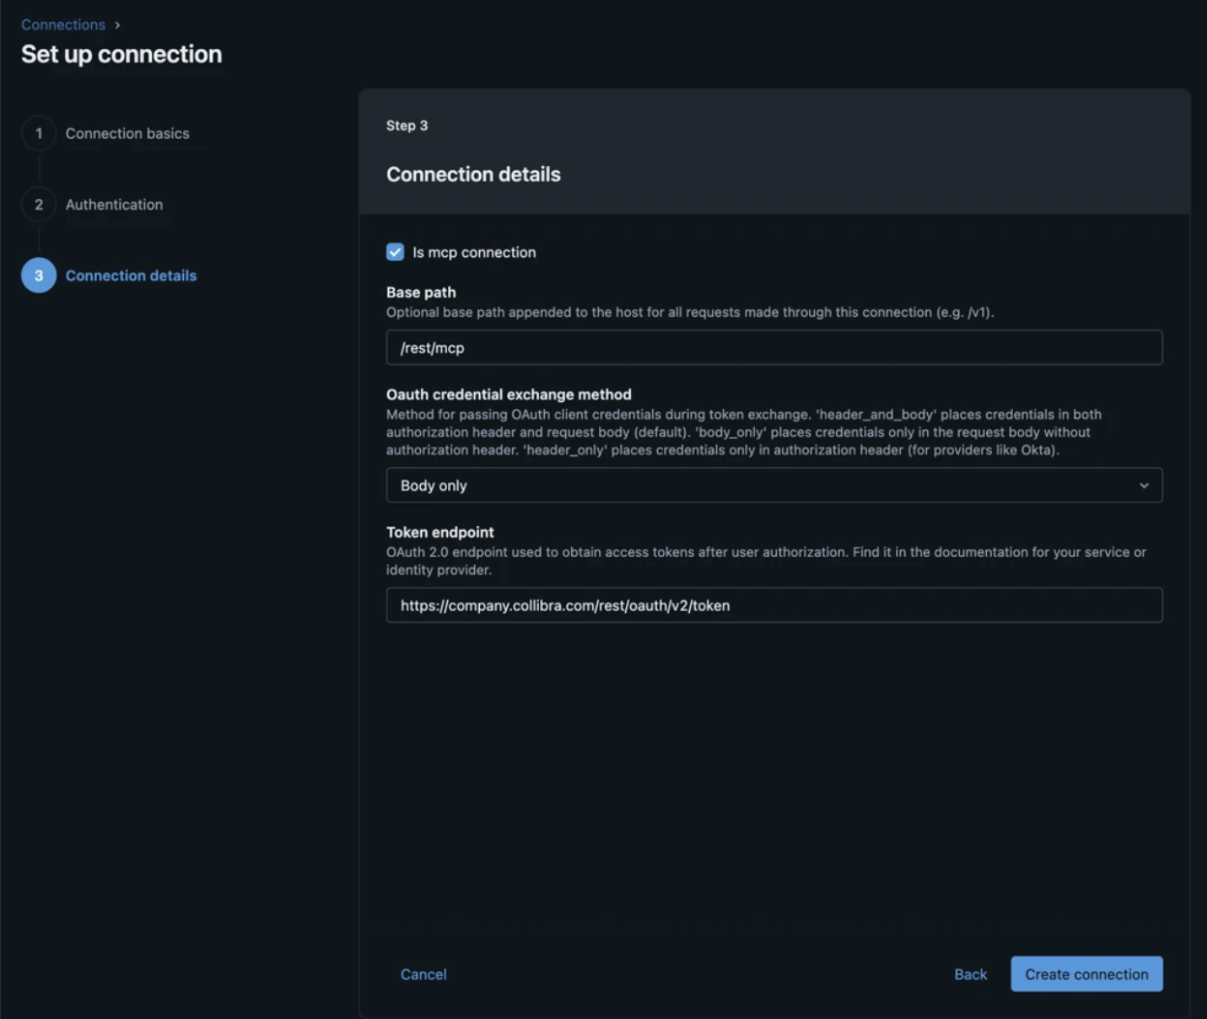
- Complete Connection details:
- Is mcp connection: true
- Base path: /rest/mcp
- OAuth credential exchange method: Body only
- Token endpoint:
https://<instance>.collibra.com/rest/oauth/v2/token
- Optional: open the Permissions tab and grant USE CONNECTION to all or selected users.
Use the connection
The connection appears under Catalog, then Connect, then Connections. Each user authenticates with their own credentials:
- Open the connection and click Login in the top right.
- Sign in with your Collibra credentials, or through SSO if it is configured.
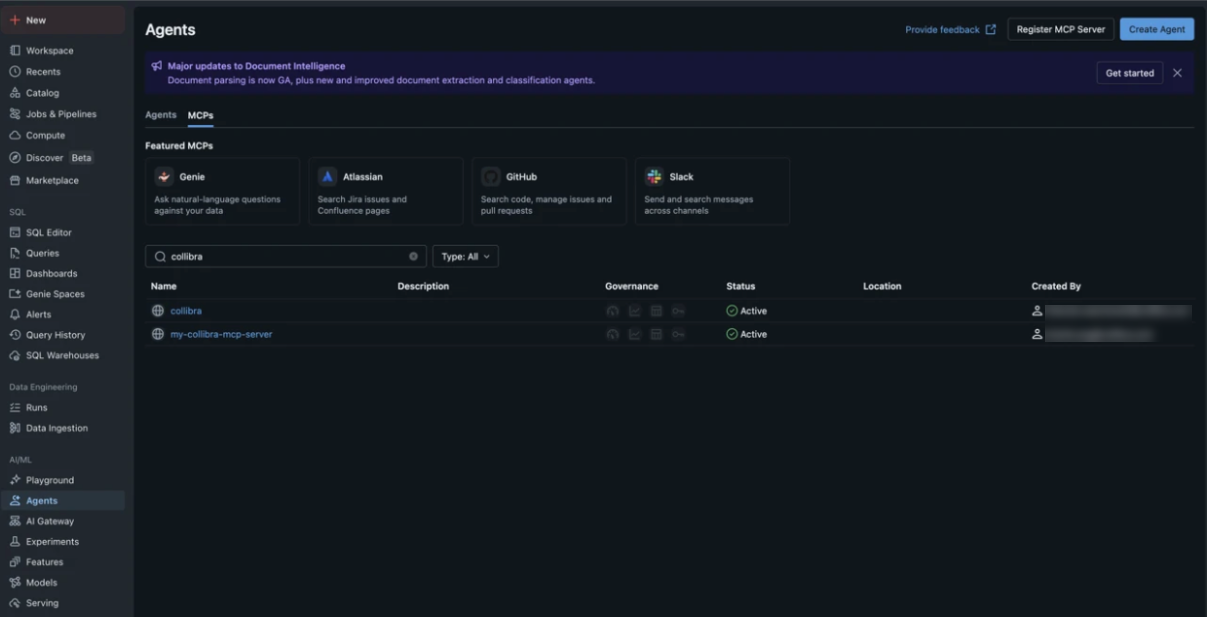
Once authenticated, you can use the Collibra tools:
- Go to Agents in the left menu, select the MCPs tab, and find the connection.
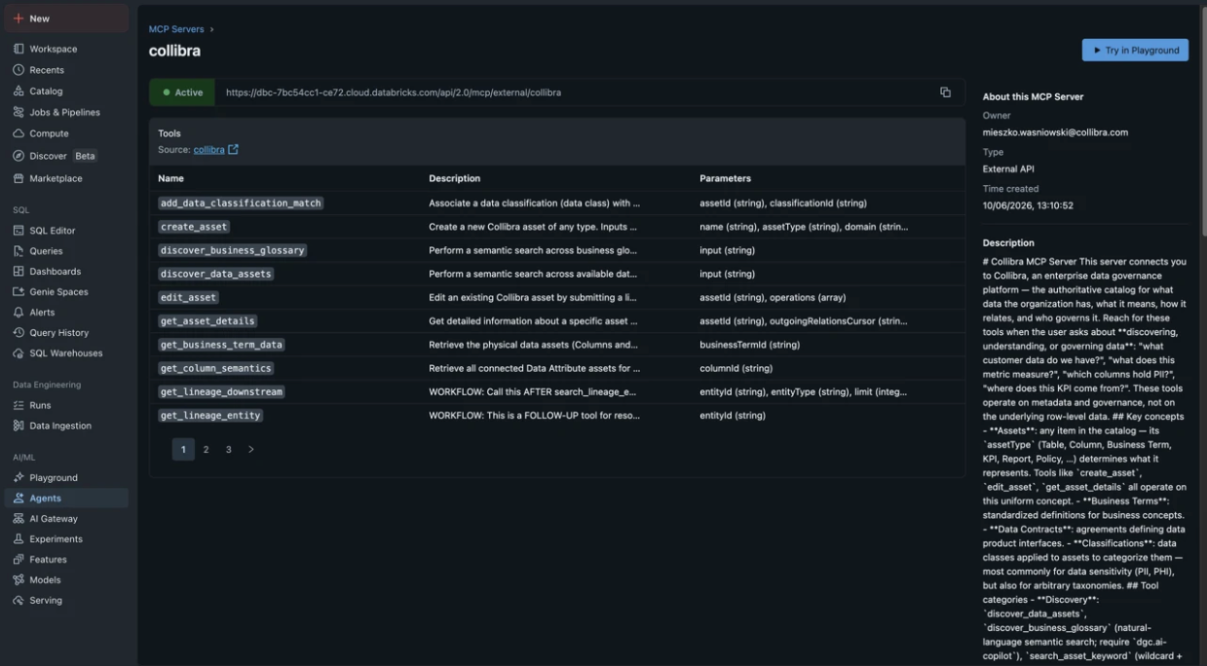
- Follow the link to the MCP server to see the available tools.
- Click Try in Playground to open the AI Playground with the Collibra MCP server preselected.
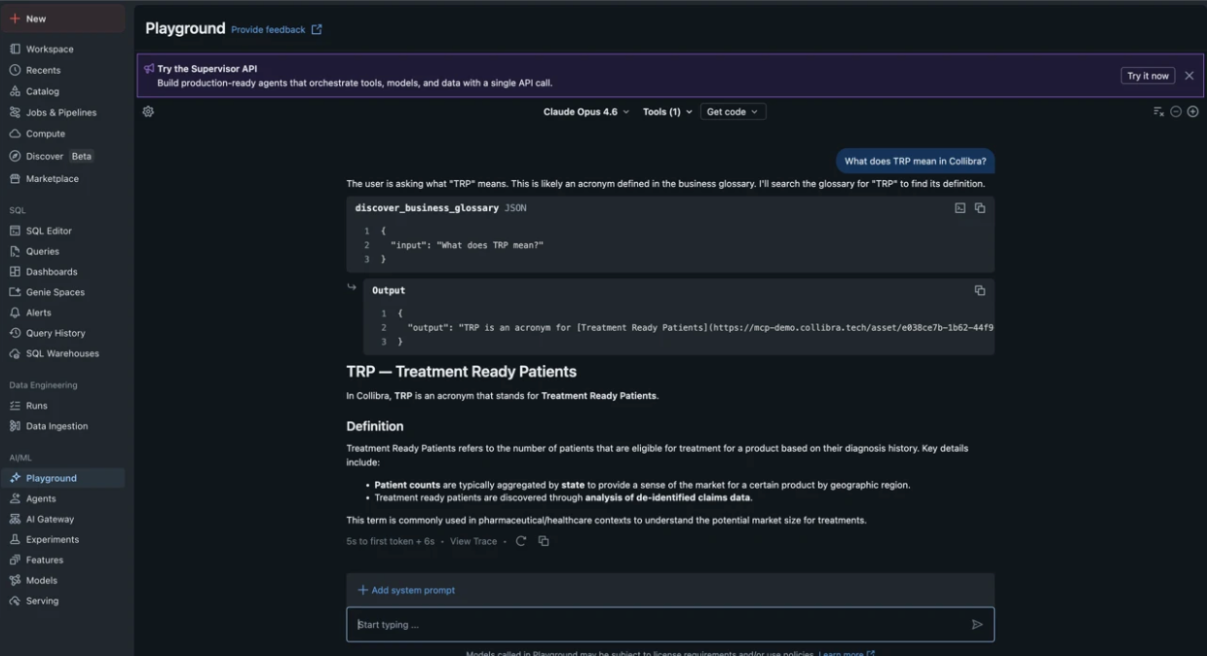
After you connect
- Agents dynamically discover all Collibra tools, including search, lineage, and glossary.
- Access is enforced through Unity Catalog permissions.
- The AI Playground lets you prototype with Collibra tools before building production agents.