Once you have reviewed the preflight checks and obtained the required permissions, you can manage data contracts and their manifest file from Collibra.
Create a data contract
Prerequisites
You have reviewed the preflight checks.
Steps
- Open the Data Product asset page.
- Scroll down to the section that shows the Output ports viewer widget.
- Click the card of the Data Product Port you want to add a data contract to.
The Preview panel opens showing tabs:- Data product port shows the attributes and schema information in the product port.
- Data contract shows the data contract details if available.
- Click the Data contract tab.
If no data contract has been initiated yet, buttons are shown which allow you to create a new contract. - Choose one of the following methods to create a data contract:
- Knowledge graph generation allows you to generate a data contract based on the available information in the Data Product, Data Product Port, and linked Tables.
- Click Generate contract manifest.
The Generate manifest dialog box appears. - Complete the fields as follows:
Field Description Name The name you want to give to the Data Contract asset. Domain The domain in which you want to add the Data Contract. We advise to add it to the same domain as the Data Product. Initial version The version of the manifest. By default the version is set to 0.0.1. Manifest ID The Manifest ID field defines how you want to structure the ID of the manifest file in the Data Contract asset. You can select the following options: - Use data contract asset UUID as manifest ID
- Use custom manifest ID
Download manifest Select the Download manifest checkbox to download the generated manifest file. - Click Generate or Generate and download.
The name depends on your selection.
A new Data Contract asset and manifest file are created. The manifest file is automatically completed with the Tables, Columns, and Descriptions from the Data Product Port asset, regardless of your personal View permissions on these assets. The manifest file also includes the values of some SLA attributes from the Data Contract asset, and, if supported, a Servers section. For more information, go to mappings.
If you have selected to download the file, the file is downloaded automatically to your computer.
- Click Generate contract manifest.
- File Upload allows you to create a file outside Collibra and use this file as the manifest file for the Data Contract asset of the Data Product Port.
- Click Upload contract manifest.
The Upload manifest dialog box appears. - Click Upload a file or drop it into the Upload a file section.
The file gets uploaded. - Complete the fields as follows:
Field Description Name The name you want to give to the Data Contract asset. Domain The domain in which you want to add the Data Contract. We advise to add it to the same domain as the Data Product. Initial version The version of the manifest. By default the version is set to 0.0.1. Manifest ID The Manifest ID field defines how you want to structure the ID of the manifest file in the Data Contract asset. The manifest ID defined in the uploaded file is automatically picked up.
- Click Upload.
A new Data Contract asset is created. The uploaded manifest file is automatically set to the latest version of the Data Contract.
- Click Upload contract manifest.
- CLI allows you to get the correct command to use in the CLI to create a Data Data Contract and manifest file.
Click the Copy to Clipboard icon and follow the instructions in the CLI information to start working on the data contract. For information, go to Creating and maintaining data contracts and their manifest files through CLI and API.
- Knowledge graph generation allows you to generate a data contract based on the available information in the Data Product, Data Product Port, and linked Tables.
Manage a data contract via Collibra
In Collibra, you can manage the Data Contract Manifest files from the Data Contract asset page. You can, for example, replace a manifest with a new version by downloading the existing version, updating it locally, and uploading it again.
Prerequisites
- You have reviewed the preflight checks.
- A data contract is available.
Upload a new data contract manifest version
- Open the Contract Manifest information in a Data Contract asset page.
The active data contract manifest is shown. - From the More icon, select Upload a new version.
The Upload new manifest version dialog box appears. - Click Upload a file or drop the file into the upload area.
- Click Upload.
The new version is uploaded. Depending on your selections, the file is now the active version.
| Field | Description |
|---|---|
| Target data contract asset |
The name of the data contract. |
| New version to upload |
The version of the manifest. If you are generating a new version of the manifest file, you can't change the version number in this field. The upload process checks if the version number already exists. It doesn't look at the file name, nor the version number mentioned inside the file. |
| Set as active manifest version | Select the Set as active manifest version checkbox if you want the new file to become the active version. This means that the previous active version will be deactivated. |
| Force overwrite if version already exists |
Select the Force overwrite if version already exists checkbox if you want to upload this file version even though it already exists for the data contract. To validate if the version already exists, the upload process checks the version number provided in this dialog box. It doesn't look at the file name, nor the version number mentioned inside the file. |
Generate a new data contract manifest version
Collibra can generate a new draft manifest file based on the latest synchronized metadata in Collibra.
- Open the Contract Manifest information in a Data Contract asset page..
The active data contract manifest is shown. - If needed, select another version from the drop-down list.
The selected data contract manifest acts as the base for the new draft. - From the More icon, select Generate a new version.
The Generate and upload a new version dialog box appears, showing the Select version step. - In New version, enter the version number that you want to give to the new draft.
- Click Generate.
Collibra retrieves the latest synchronized metadata and updates the relevant content in the base manifest file. Any existing content that is not synchronized by Collibra remains unchanged, ensuring that unsynchronized content is preserved. For information on the mapping, go to mappings.
The Review manifest step shows the new draft as code. - Review the draft content and make changes as needed.
You can also download the new draft at this point. - Once all is good, click Continue.
The Upload step is shown. - Complete the fields as needed:
Field Description Target data contract asset The name of the data contract.
You can't change this field.New version to upload The version of the manifest.
If you are generating a new version of the manifest file, you can't change the version number in this field.
If you are uploading a first version of the manifest, by default, the version is set to 0.0.1. You can change this to another number.The upload process checks if the version number already exists. It doesn't look at the file name, nor the version number mentioned inside the file.
If you don't force an overwrite through the Force overwrite if version already exists checkbox, Collibra shows an error message if the version already exists.Set as active manifest version Select the Set as active manifest version checkbox if you want the new file to become the active version. This means that the previous active version will be deactivated. Force overwrite if version already exists Select the Force overwrite if version already exists checkbox if you want to upload this file version even though it already exists for the data contract.
To validate if the version already exists, the upload process checks the version number provided in this dialog box. It doesn't look at the file name, nor the version number mentioned inside the file.
- Click Upload.
The new version is uploaded. Depending on your selections, the file is now the active version. The file includes all Tables and Columns related to the Data Product Port, regardless of your personal View permissions on these assets.
Apply a data contract manifest version
When you apply a data contract manifest version, it creates and updates relations between Data Product Port and Table assets based on the active manifest version. It also updates SLA attributes on the Data Contract asset directly from the active manifest version.
- Open the Contract Manifest information in a Data Contract asset page.
The active data contract manifest version is shown. - If needed, make another version active.
Go to Make a data contract manifest version active. - From the More icon, select Apply manifest.
The Apply Changes to Knowledge Graph dialog box appears. - In the Review step, verify that the correct Data Product Port will get updated, and that the correct data contract manifest version will be applied.
- Click Next.
- In the SLA Attributes Changes step ,verify the changes that will be applied to the SLA attributes in Collibra.
For information on how Collibra finds SLA attributes to update, go to SLA mappings.
The Action column informs you about the type of change.- To update the SLA attributes accordingly, click Apply changes.
The SLA attributes are updated immediately. - To skip updating SLA attributes, switch off the Apply changes option and click Skip section.
If the Apply changes option is switched off, the Apply changes button changes to Skip section.
- To update the SLA attributes accordingly, click Apply changes.
- In the Schema Relations Changes step, verify the relations that will be added, updated, or deleted in Collibra.
For information on how Collibra finds relations to update, go to Relations mappings.
The Action column informs you about the type of change.- To update the relations accordingly, click Apply changes.
The relations are updated immediately. - To skip updating the relations, switch off the Apply changed option.
If the Apply changed option is switched off, the Apply changes button changes to Skip section.
The Overview step shows the changes that have been applied to Collibra data.
- To update the relations accordingly, click Apply changes.
- Click Done.
The dialog box closes.
Make a data contract manifest version active
- Open the Data Contract asset page and click Contract Manifest.
The current, active data contract manifest is shown.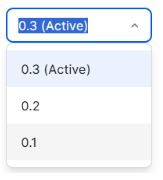
- Select the version you want to make active from the drop-down list.
- From the More icon, select Set as active.
The Set new active version dialog box appears informing you that this action will mean the existing active version becomes inactive. - Click Set as active.
The selected version becomes active. The active version is tagged with (Active) after the version.
Compare Data Contract Manifest versions
- Navigate to a Data Contract asset page and click Contract Manifest.
The active data contract manifest is shown. - If needed, select another version.
- From the More icon, select Compare to.
The Compare Data Contract version dialog box opens in a split view. The selected version is shown on the left-hand side. - In the right-hand Version drop-down list, select the version you want to compare the selected version against.
Colors highlight updates, removals, and additions in both versions.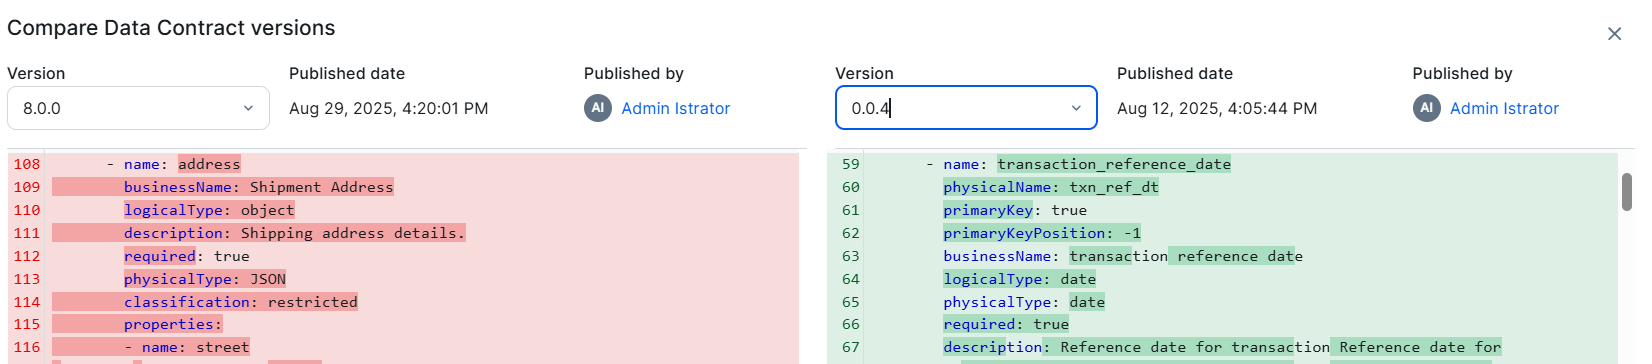
Delete a data contract manifest version
To delete a manifest file, select the version from the drop-down list and from the More icon select Delete.
You can't delete manifest files that are active.