Manage row filters
In Data Access, a row filter is a type of access control that hides all rows in specific tables or views from everyone except its beneficiaries. The beneficiaries see only the rows that meet the filter criteria that are defined in the row filter.
You can create a row filter to restrict the visibility of rows in specific tables or views. If you create a row filter, users who already have access on the table or view can no longer see any of its rows, unless you add them as beneficiaries.
Prerequisites
- You have ownership of the table or view whose rows you want to hide.
- To create a row filter: You have one of the following:
- Ownership of any data object in Data Access.
- A global role with the Data Access > Create Access Controls global permission.
- To edit a row filter: You have one of the following:
- Ownership of the row filter that you want to edit (or all of its data objects).
- A global role with the Data Access > Create Access Controls global permission.
Steps
- On the Data Access landing page, in the left pane, click ACCESS CONTROLS > Row filters.
- Do one of the following:
- To create a row filter: On the Row filters page, click Create row filter. On the Create row filter page, enter the information, and then click Create.
- To edit a row filter: On the Row filters page, click the name of the row filter, and then click Edit. Edit the information, and then click Save.
Result
- You become the owner of the row filter that you created. You can add more owners by clicking
 > Edit owners.
 - Data Access automatically triggers a synchronization to push the row filter to the target data source. Until the row filter is created or updated in the data source, the Sync status field in the Details sidebar shows Not connected (for a new row filter) or Out of sync (for an edited row filter). After the synchronization finishes, the synchronization status changes to Synced.
- If you selected a table or view that you do not own, it is not added to the row filter immediately. Instead, an access request is generated and assigned to the table's or view's owner. If the owner approves the access request, the table or view is added to the row filter. When this happens, the synchronization status of the row filter changes to Out of sync briefly while Data Access pushes the changes to the data source. After the synchronization finishes, the synchronization status returns to Synced.
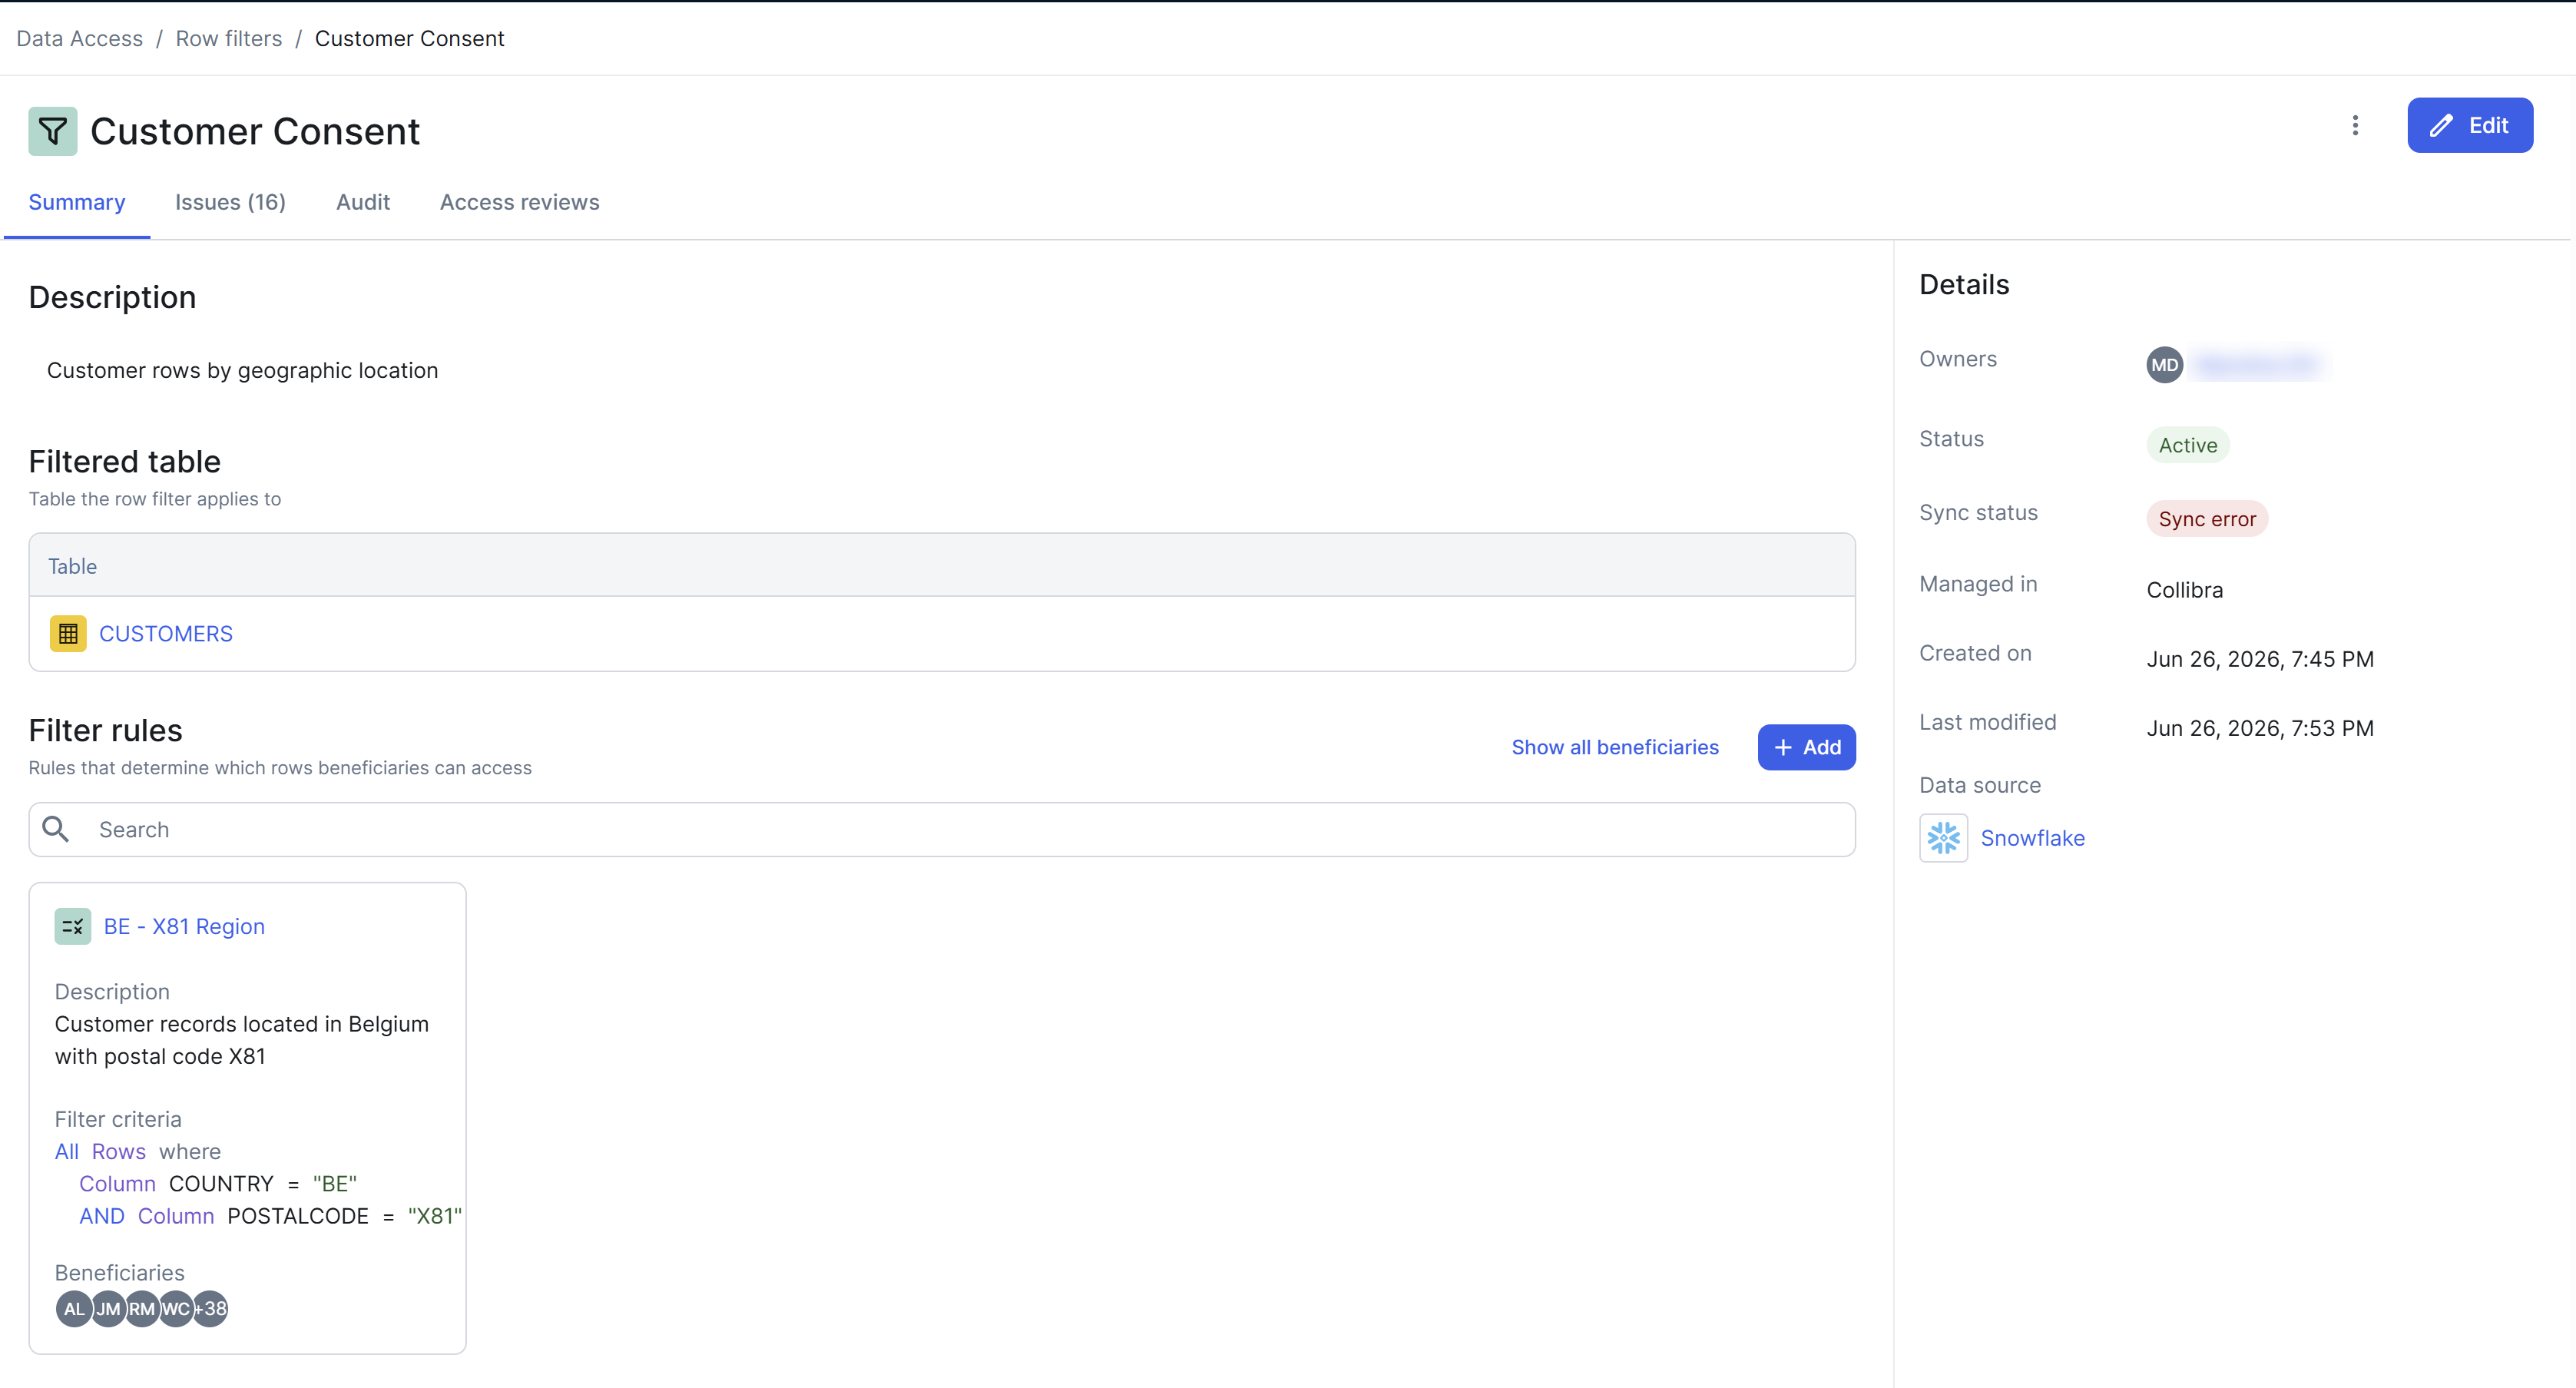
Guidance: Defining a row filter
Use this section to guide you when creating or editing a row filter. If the row filter was already created, on the row filter page, click Edit, and then complete the following sections.
General
Specify the basic properties of the row filter in the General section.
| Field | Description |
|---|---|
| Name |
A display name for the row filter, for example, Customer Consent. |
| Description |
A brief explanation of the row filter's purpose, for example, Hides customer records lacking active consent. |
Filtered tables
Specify the tables or views whose rows you want to hide in the Filtered tables section.
- In the Which tables are filtered section, click Add.
- In the Where does this row filter apply dialog box, select the data sources for the row filter, and then click Continue. Note that you cannot change the data sources later. This step is applicable only when you create a row filter (not when you edit a row filter).
- In the How do you want to pick tables to filter dialog box, select one of the following options, and then click Continue.
Option Description Data objects Hides the rows in the tables or views that you specify. Dynamic rule Hides the rows in the tables or views that meet the conditions that you specify. - If you selected Data objects, in the Select the tables you want to filter dialog box, select the tables or views that contain the rows that you want to hide, and then click Add.
- If you selected Dynamic rule, in the Which schema do you want to filter dialog box, select the schemas within which you want the rows to be hidden, and then click Add.
- Remember to save your changes.
- To view all the identities that are explicitly assigned to the row filter, as well as those that are inherited from groups and any linked roles, click Show all beneficiaries in the Filter rules section.
- The row filter hides all the rows in the tables or views from everyone, as indicated by the default filter rule All with filter criterion All Rows. If, however, you want specific identities to be able to see either all or some rows, complete the Filter rules section.
Guidance: Defining a filter rule
Use this section to guide you when creating or editing a filter rule in a row filter. You can define a filter rule only after you create the row filter.
To create or edit a filter rule, on the row filter page, in the Filter rules section, click Add (to create) or  next to the filter rule (to edit), and then complete the following sections.
General
In the General section, specify the basic properties of the filter rule.
| Field | Description |
|---|---|
| Name |
A unique display name for the filter rule, for example, Active Marketing Consent. |
| Description |
A brief explanation of the filter rule's purpose, for example, Shows customer records having active marketing consent. |
Filter criteria
In the Filter criteria > Which rows can be accessed section, specify the criteria that determine which rows to show to the beneficiaries. Rows that meet the filter criteria are called filtered rows.
| Field | Description |
|---|---|
| Column |
The column that you want to evaluate to determine if a row is shown to the beneficiaries, for example, a Marketing Consent column. If the row filter applies to multiple tables or views, the Column field shows a drop-down list of the columns that are common to all of them. You can also enter a column name manually if it does not appear in every selected table or view. Warning If a filter rule references a column that is missing from a filtered table or view, Data Access reports an error on the Issues page. The impact on that table or view in the meantime depends on your data source.
|
| Operator |
The operator that defines the condition between the column and the target value. |
| Value |
The value that the column data needs to match for the row to be shown to the beneficiaries, for example, Active. For security reasons, Data Access does not import actual column values from your data sources. Due to this, you need to manually enter the exact value into this field (as it appears in your target table or view). |
- You can combine multiple conditions by using AND or OR logic to build more precise filter criteria.
- You can also use the Code tab to build filter criteria.
Beneficiaries
In the Beneficiaries section, specify the identities who can see the rows that meet the filter criteria. You can also specify groups and other roles.
- In the Who has access to the filtered rows section, click Add.
- In the Which type of beneficiary do you want to add dialog box, select one of the following options, and then click Continue.
Option Description Identities Shows only filtered rows to the identities that you specify, if they have access on the table or view containing the rows.
Groups Shows only filtered rows to the identities within the groups that you specify, if they have access on the table or view containing the rows.
Dynamic rule Shows only filtered rows to the identities that meet the conditions that you specify, if they have access on the table or view containing the rows.
Roles Shows only filtered rows to the beneficiaries of the roles that you specify, if they have access on the table or view containing the rows, but only through the specified roles. That is, if the same beneficiaries have access on the table or view through any other role, they see zero rows.
- If you selected Identities, Groups, or Roles, select one or more identities, groups, or roles, and then click Add.
- If you selected Dynamic rule, in the Which conditions should apply dialog box, enter the required information, and then click Add.
- To change the expiration date (which indicates when access is revoked) for the beneficiaries:
- In the Expires at column, double-click the current value.
- In the Edit expires at dialog box, select the new expiration date, and then click Apply.
- In the Expires at column, double-click the current value.
- Remember to save your changes.
- To view all the identities that are explicitly assigned to the filter rule, as well as those that are inherited from groups and any linked roles, click Show all in the Beneficiaries section.