This section shows you how to set up the archive break records feature for Pullup jobs.
Prerequisites
The following table shows the available external storage options and the requirements for each.
| Storage option | Prerequisites |
|---|---|
| Amazon S3 |
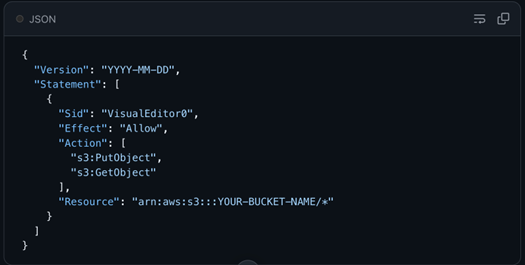 Your bucket's IAM policy must include the following permissions applied to your specific bucket resource: s3:PutObject (Required) Write Access: Allows the system to save break records directly to your S3 bucket. s3:GetObject (Required) Read Access: Allows the system to retrieve records and generate secure, 1-hour presigned URLs for safe viewing. s3:ListBucket (Optional) Admin Access: Allows administrators to view and list the files stored within the bucket. You can authenticate your S3 connection using an S3 Key (s3-key) or an S3 Instance Profile (s3-instance-profile). Once connected, the system will automatically organize your archived break records using the following folder structure: {dataset}/{YYYYMMDD}/{ruleName}/ruleBreaks.csv. |
| ADLS |
|
| Azure Blob |
|
| Google Cloud Storage (GCS) |
|
Steps
- From Explorer, connect to a Pullup data source.
- Optionally, assign a Link ID to a column in the Select Columns step.
- In the lower left corner, click
 Settings. The Settings dialog box appears.
- Under the Data Quality Job section, select the Archive Breaking Records checkbox option, then click the drop-down list. A list of available external storage options appears.
- Select the external storage option to which break records will send.
- Click Save.
- Set up and run your DQ Job.
- When a record breaks, its metadata exports automatically to your external storage service.
Important If you specify a link ID, the column you assign as the link ID should not contain NULL values and its values should be unique, most commonly the primary key. Composite primary key is also supported.