The CLI is a unified command-line tool that packages API calls, allowing you to manage your Collibra products directly from the terminal. It allows you to manually interact with your environment and seamless integrate into automation workflows.
- AI framework detection
- The CLI scans your local Python projects, including all subdirectories, to identify AI models. It automatically detects common AI frameworks, including TensorFlow, PyTorch, scikit-learn, pandas, and numpy.
- Automated manifest management
- A
collibra.yamlmanifest file is automatically created the first time you successfully complete the registration process. It is updated during each subsequent registration to ensure your local project remains synchronized with Collibra. The manifest serves as a persistent record of which AI models have been registered, storing metadata such as AI use case IDs and base model associations, to prevent redundant registrations in future scans. - On-demand help
- The CLI has a
--helpflag to retrieve built-in reference documentation. Run./collibra --helpto view a list of all available commands and flags. - Streamlined registration flow
- You initiate the entire governance workflow with a single command. This process scans your source code for AI model patterns and loads existing YAML manifest files to filter out any models that have already been registered or rejected. The CLI then guides you through the model version registration process, where you can also register new AI Use Cases and Base Models or link your versions to existing assets.
Set up and configure the CLI
To use the CLI, you have to set it up and configure it locally.
Prerequisites
- AI Business User
- AI Governance Admin
- AI Governance Viewer
- AI Producer
- You have a resource role that has the following resource permissions on the target domain for any new assets you create during the process:
- Asset > Add
- Asset > Remove
- Asset > Attribute > Add
Tip- The out-of-the-box Business Steward and Technical Steward resource roles have all of these permissions.
- For any AI Use Case assets you create during the process, you need to assign one of these resource roles on the specified target domain, which has to be of the type Business Asset Domain. AI Command Center comes with an out-of-the-box "AI Use Cases" domain for this purpose.
- For any AI Base Model assets you create during the process, you need to assign one of these resource roles on the specified target domain, which has to be of the type Technology Asset Domain. AI Command Center comes with an out-of-the-box "AI Models and Agents" domain for this purpose.
You have a global role with the Product Rights > AI Governance global permission. All of the following out-of-the-box global roles have this permission:
Requirements for organizations using SSO
If your organization signs into Collibra via SSO (SAML2 or OAuth), your standard SSO credentials cannot be used to log into the CLI. In this case, to use the CLI, you need a dedicated local account.
- Ask your Collibra administrator to create a dedicated user account directly in your Collibra environment (bypassing SSO/LDAP).
- Assign the permissions mentioned about to the new user account.
- When the user account is created, you will receive an invitation email. Click the link in the email to activate the account and set your password.
- Use these new, dedicated local credentials to authenticate with the CLI.
Steps
-
Download the CLI from GitHub, and extract it.
-
Download the appropriate file for your operating system and processor:
- Windows amd64, for most Windows units.
- Windows arm64, for Surface and others.
- Linux amd64, for most Linux units.
- Linux arm64, for Linux units with ARM architecture.
- darwin-macos all, for Mac.
- Open your terminal or command prompt.
-
Navigate to the folder where you saved the CLI file you downloaded.
For example:- Windows:
cd C:\Users\YourUserName\Downloads - Linux:
cd ~/Downloads - Mac:
cd ~/Downloads
- Windows:
-
Unarchive or unzip the binary file.
For example:- Windows:
tar -xf collibra-x.x.x-windows_xxx64.zip - Linux:
tar -xf collibra-x.x.x-linux_xxx64.tar.gz - Mac:
unzip collibra-x.x.x-darwin-macos_all.zip
- Windows:
- For Mac only: Important You may encounter a standard macOS security prompt during installation. This occurs because the current version is pending an official Apple signing key. We are working with Apple to automate this process.
If your Mac prevents the file from running because the developer isn't verified:- Open System Settings/Preferences > Security & Privacy.
- Look for a message about the "collibra" file being blocked and click Open Anyway.Tip Alternatively, run the following command to verify the file:
xattr -d com.apple.quarantine <file>.
- Open System Settings/Preferences > Security & Privacy.
- Run the binary file without any arguments to confirm it's working.
- Windows:
.\collibra - Linux:
./collibra - Mac:
./collibra
- Windows:
-
Download the appropriate file for your operating system and processor:
-
Set the environment variables.
- Open your terminal or command prompt.
- Run the following commands, depending on your operating system.
Replace the place-holder information with your information. If you use a proxy, use the variablehttps_proxycombined with the following structure.Windows CMD SET COLLIBRA_URL=https://<YourCollibraEnvironment>.collibra.comSET COLLIBRA_USERNAME=<YourUsername>SET COLLIBRA_PASSWORD=<YourPassword>Windows Powershell $env:COLLIBRA_URL="https://<YourCollibraEnvironment>.collibra.com"$env:COLLIBRA_USERNAME="<YourUsername>"$env:COLLIBRA_PASSWORD="<YourPassword>"Mac and Linux export COLLIBRA_URL='https://<YourCollibraEnvironment>.collibra.com'export COLLIBRA_USERNAME='<YourUsername>'export COLLIBRA_PASSWORD='<YourPassword>'
Tip Setting the environment variables as described here is temporary and only lasts for the duration of your current terminal session. To make it permanent, open a configuration file by running, for example~/.bashrc,~/.zshrc, or~/.bash_profile. Then add the 3 lines mentioned in the table above, save the file, and then restart your terminal. -
Run the following command to confirm that the CLI setup was successful:
- Windows
.\collibra info - Mac and Linux:
./collibra info
- Windows
Register an AI model version to your Collibra environment
- Open your terminal or command prompt.
- The Collibra CLI operates relative to your current working directory. Therefore, run the following command to navigate to the root of your Python project:
cd /path/to/your/ml-project - Run the command:
collibra ai-gov register
The CLI guides you through registering AI model versions and linking them to a new or existing (in Collibra) AI base model and AI use case.
Let's go through the registration process
In addition to registering your AI model versions in Collibra, the process enables you to register an AI use case and an AI base model, or link to an existing AI base model. Let's go through the typical process.
Step 1: Detecting AI model versions
When you run the command: collibra ai-gov register, the CLI scans the current or specified directory and all subdirectories for AI frameworks, and loads the collibra.yaml manifest file if one exists. A manifest file is automatically created the first time you successfully complete the registration process. It is updated during each subsequent registration.

- If no new AI models are detected, you can run
collibra ai-gov register --rescanto scan for any previously rejected models. - If AI model versions are detected, but they already exist in the manifest (meaning no new models), the process terminates.

- If new AI model versions are detected, the CLI attempts to retrieve linked AI use case information from the manifest.
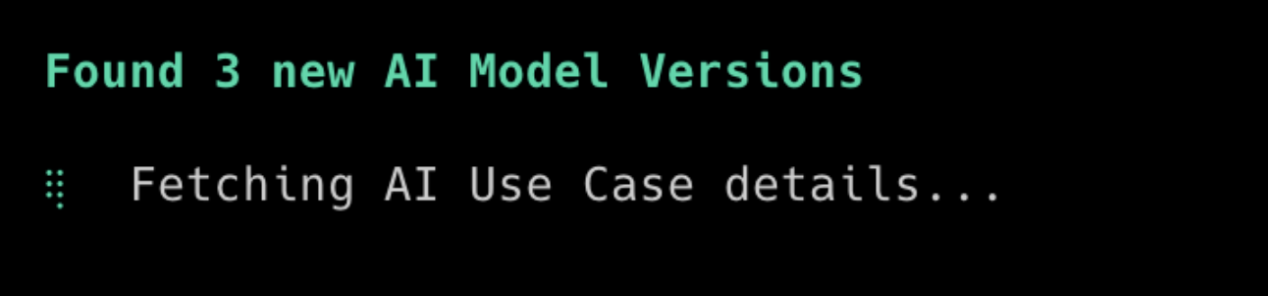
Step 2: Fetching an AI use case
-
If an AI Use Case asset ID already exists in the manifest, the CLI fetches the details directly via API.

This only occurs if the manifest already contains an existing AI use case. An API call is executed to fetch the AI Use Case asset (and related AI Base Model asset) by ID, from the manifest.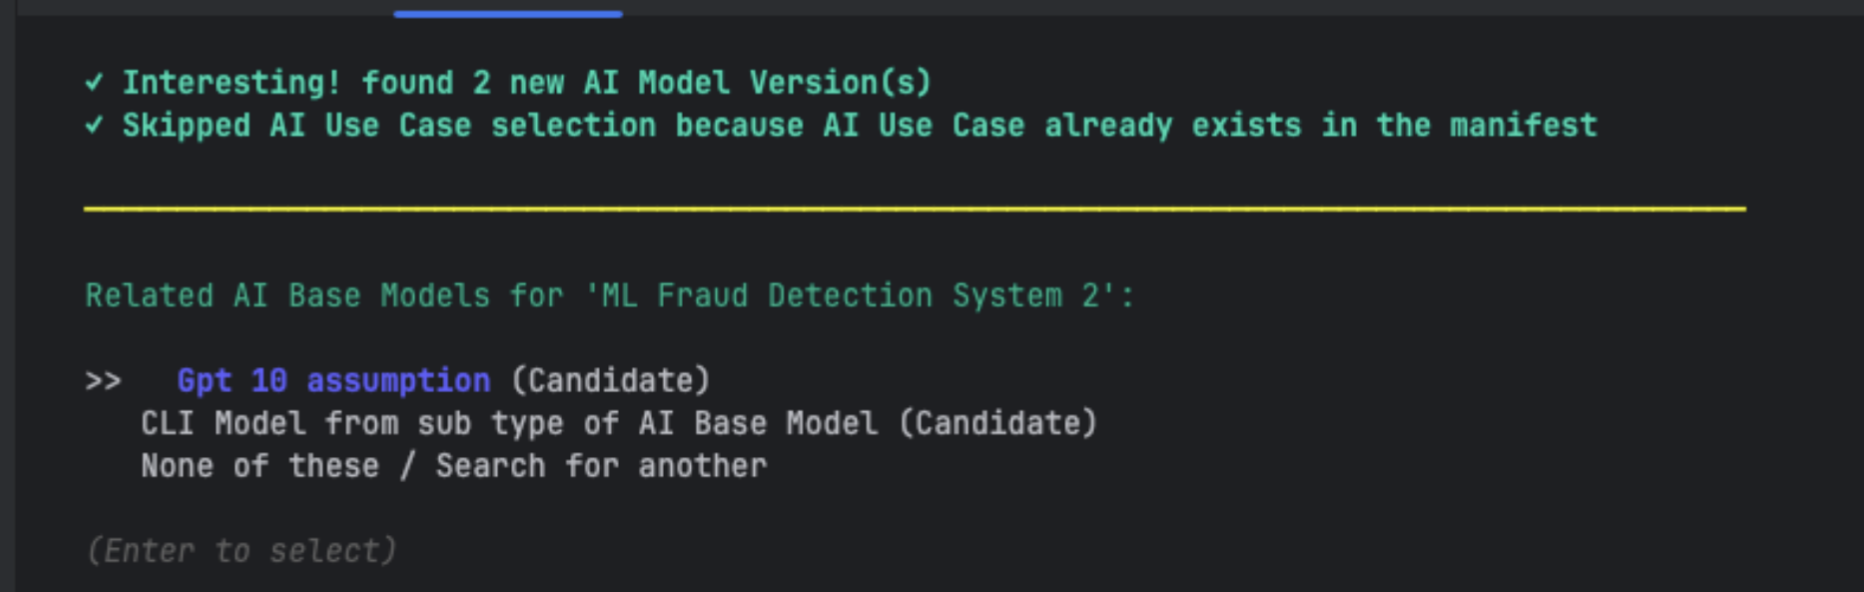
-
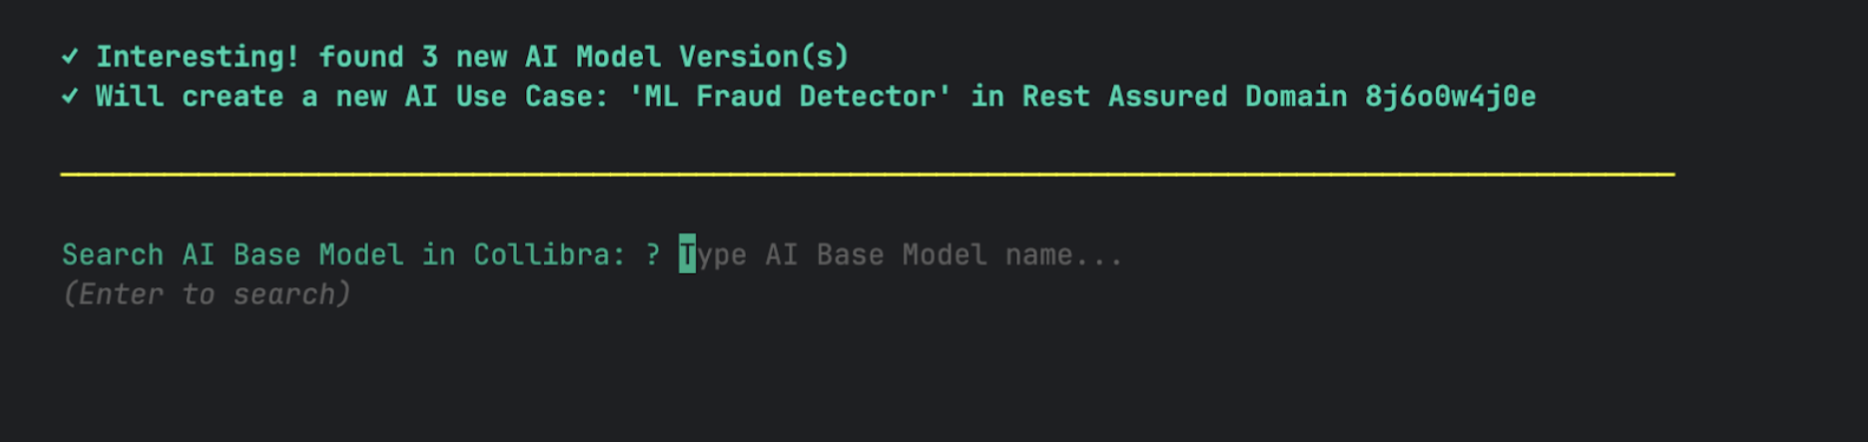
If an AI Use Case asset ID does not already exists in the manifest, you can search for an AI Use Case asset in Collibra or choose to create a new one. The following example image shows the search.
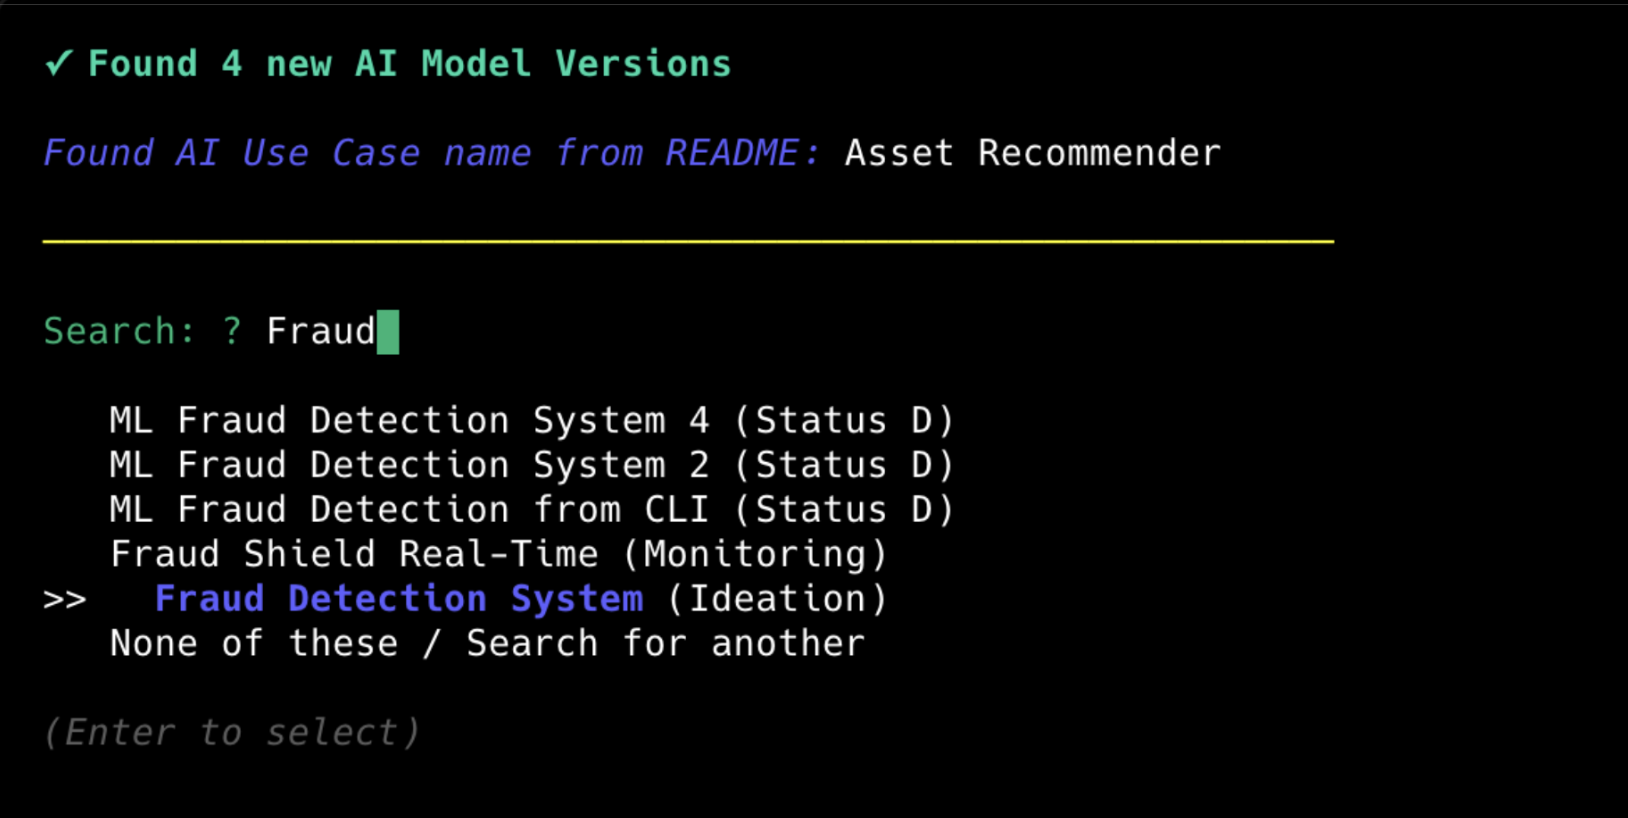
If you chose to create a new AI Use Case asset, you need to select a domain for the asset.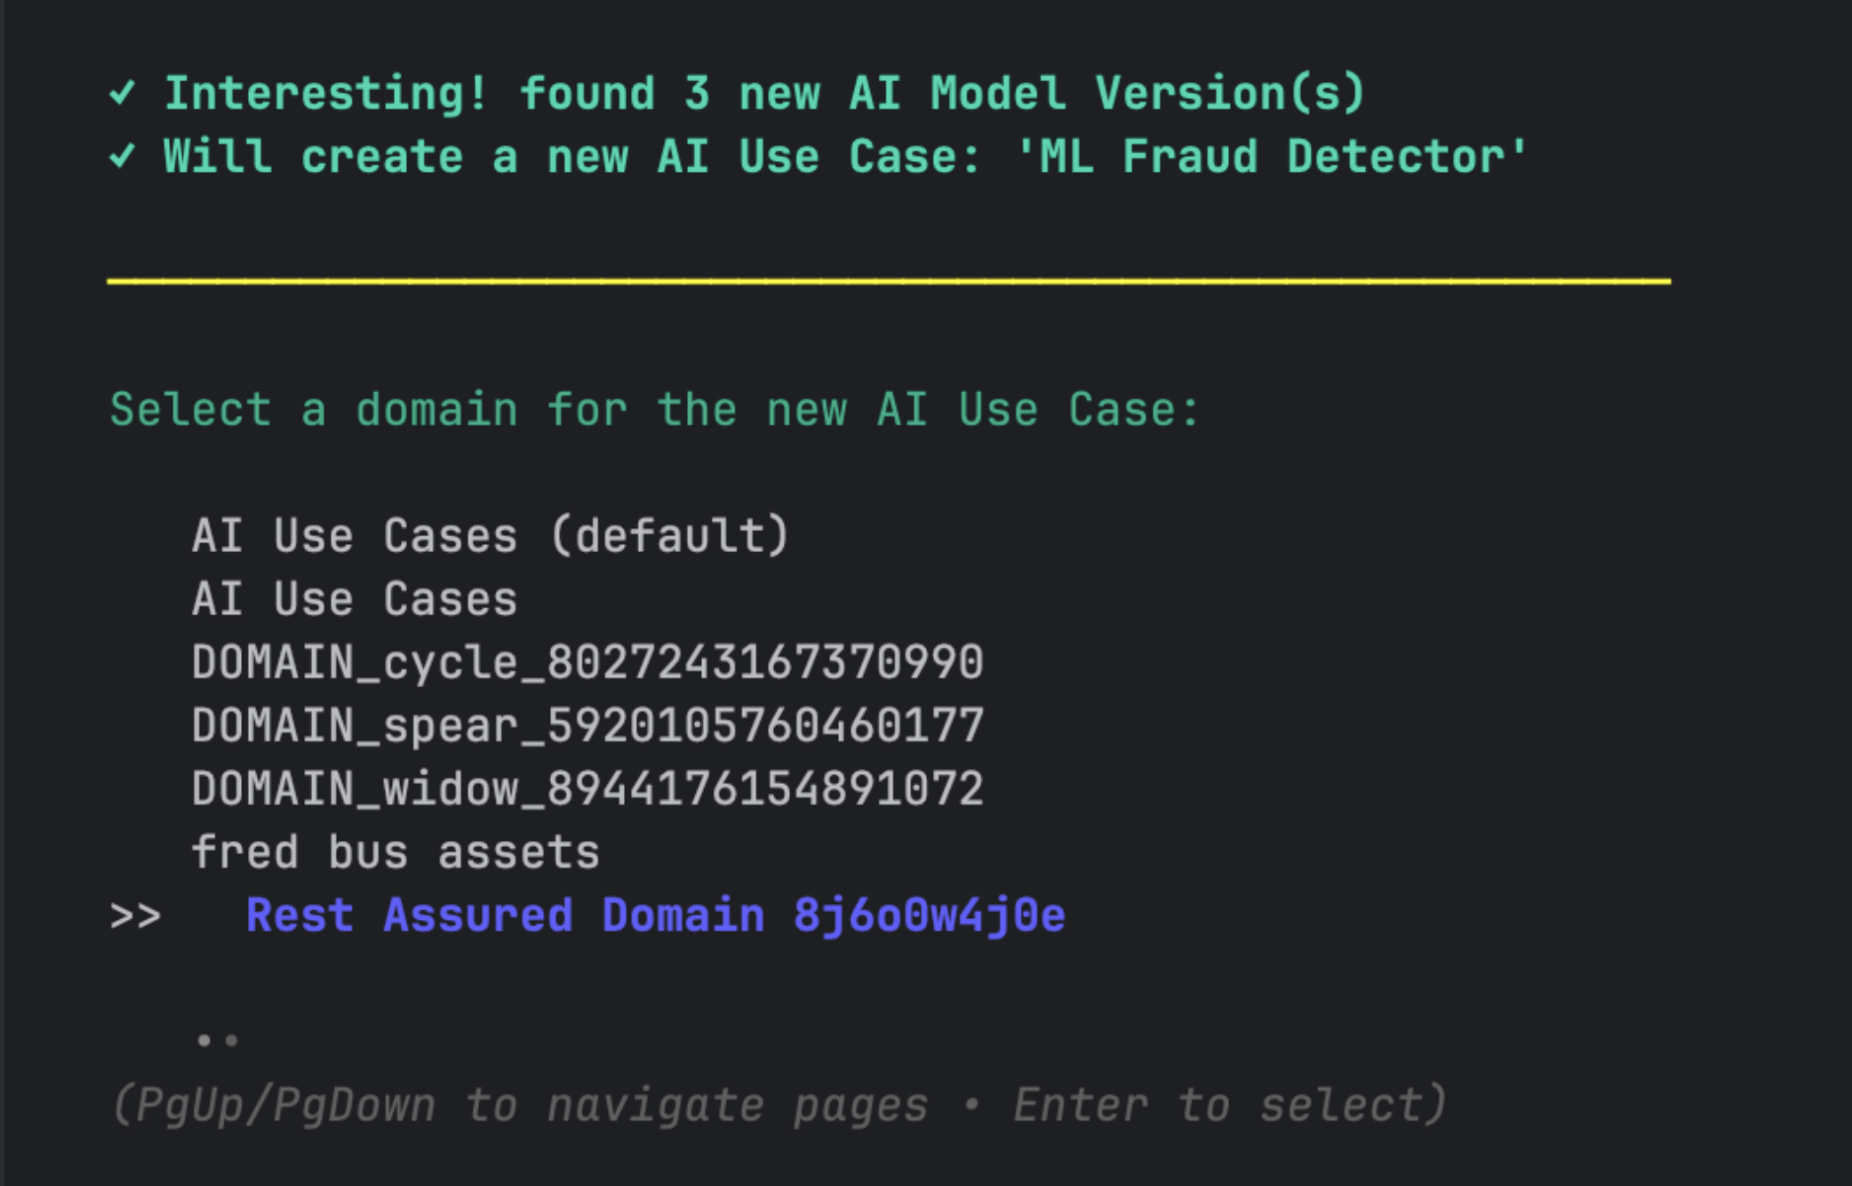
If the list of domains cannot be fetched, you can select the default domain: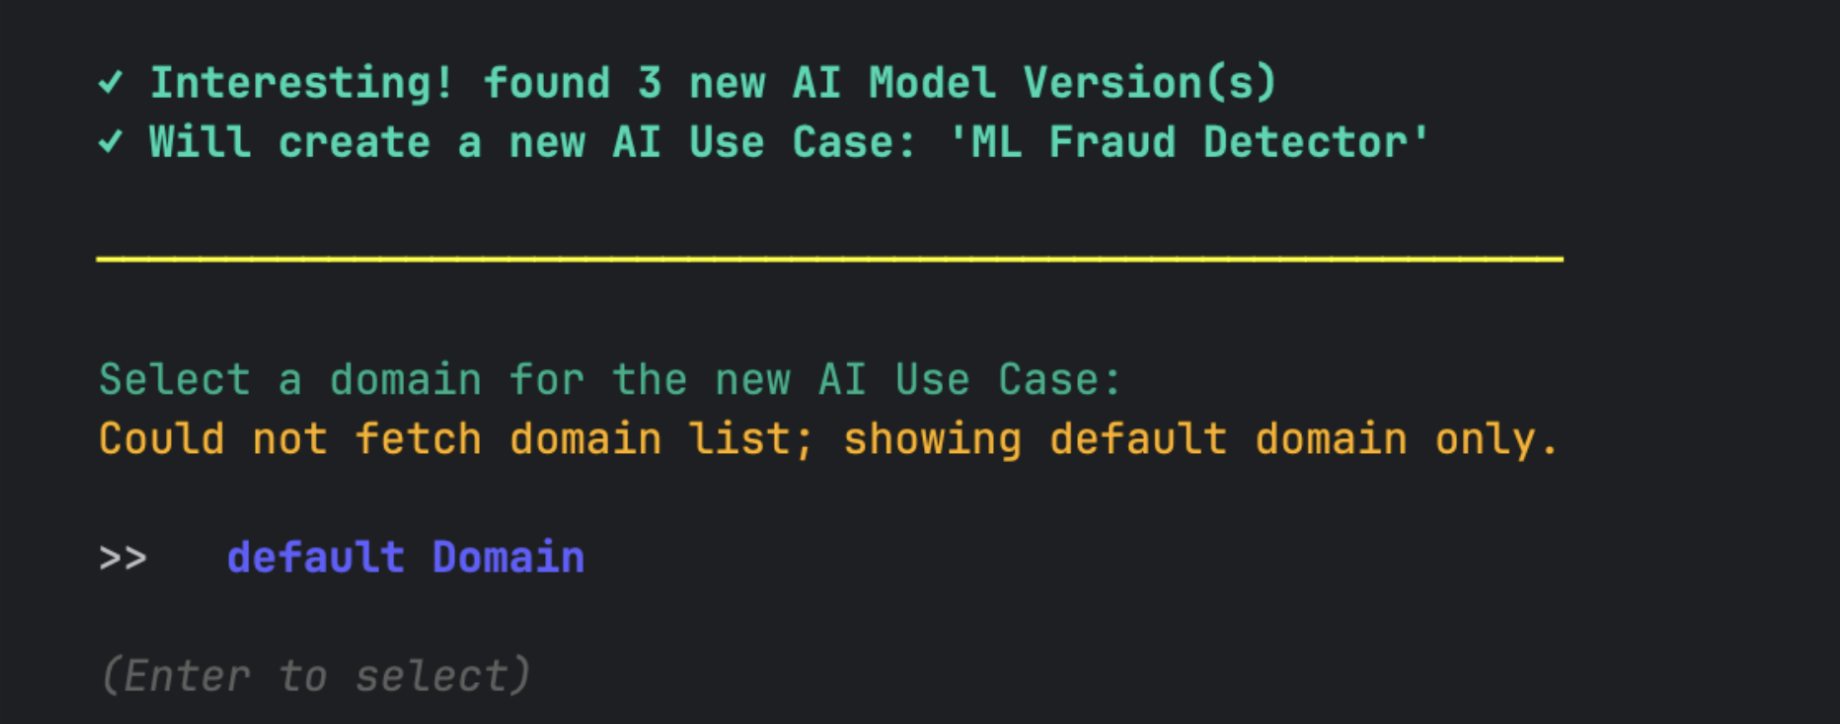
After selecting a domain, the CLI shows a confirmation status like the following example.
Step 3: Fetching an AI base model
-
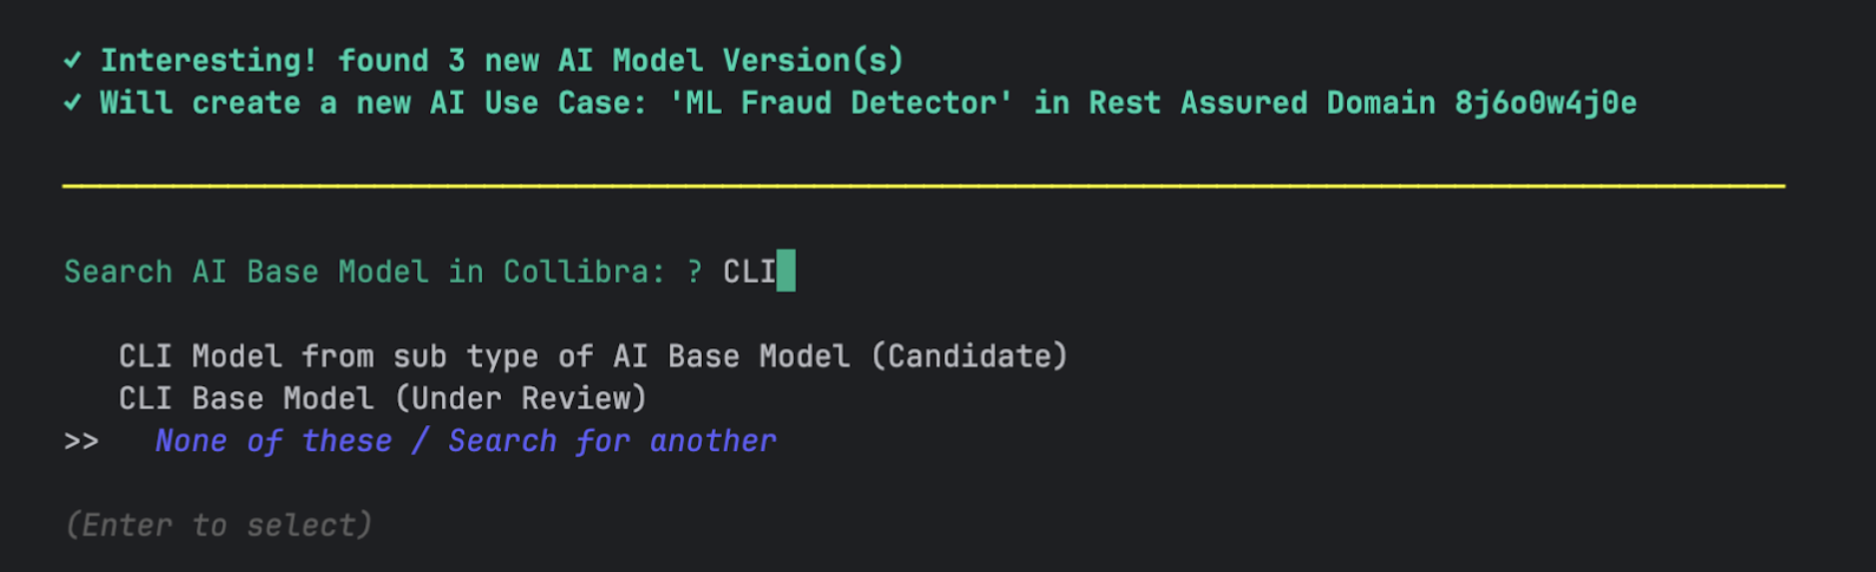
Search for an AI Base Model asset in Collibra.
Select one from a pre-populated list of AI Base Model assets.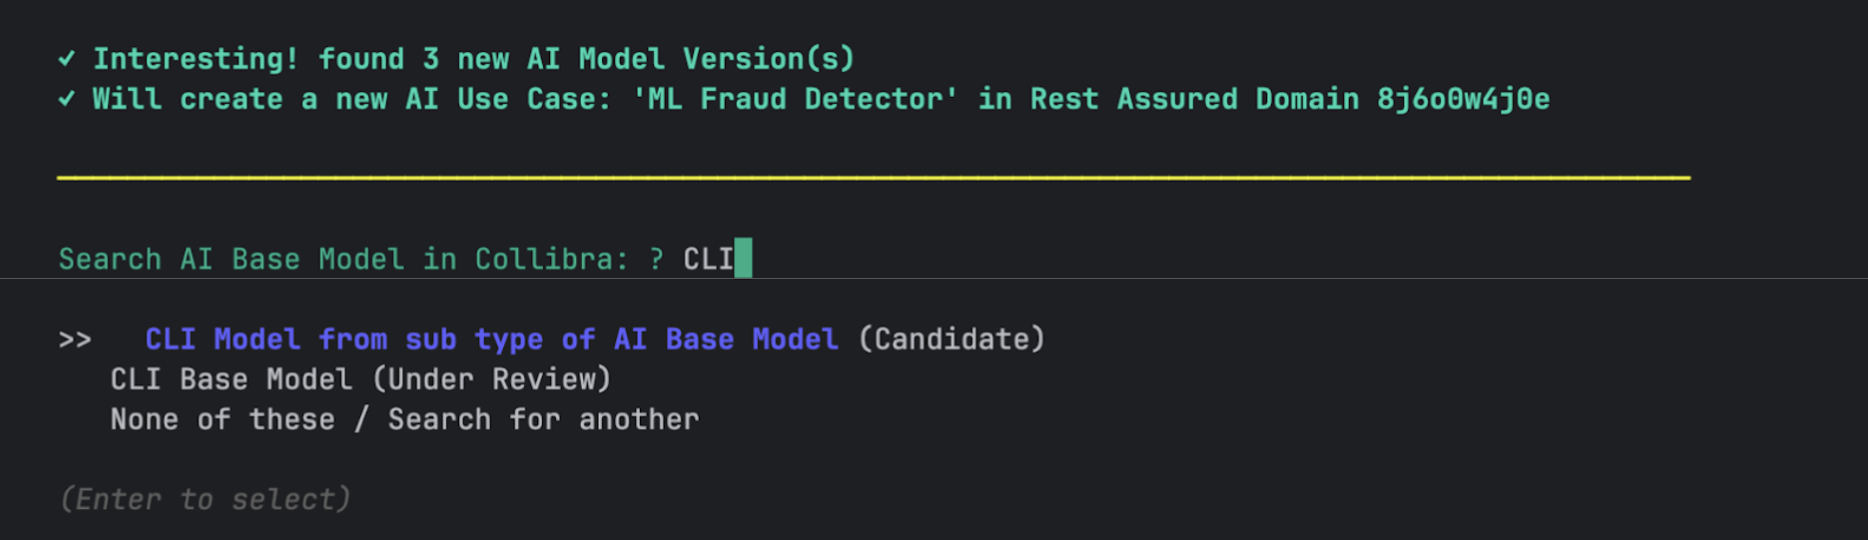
-
Or, if none of the found AI Base Model assets are what you need, you can continue searching.
If the search doesn't yield helpful results, you can create a new AI Base Model asset.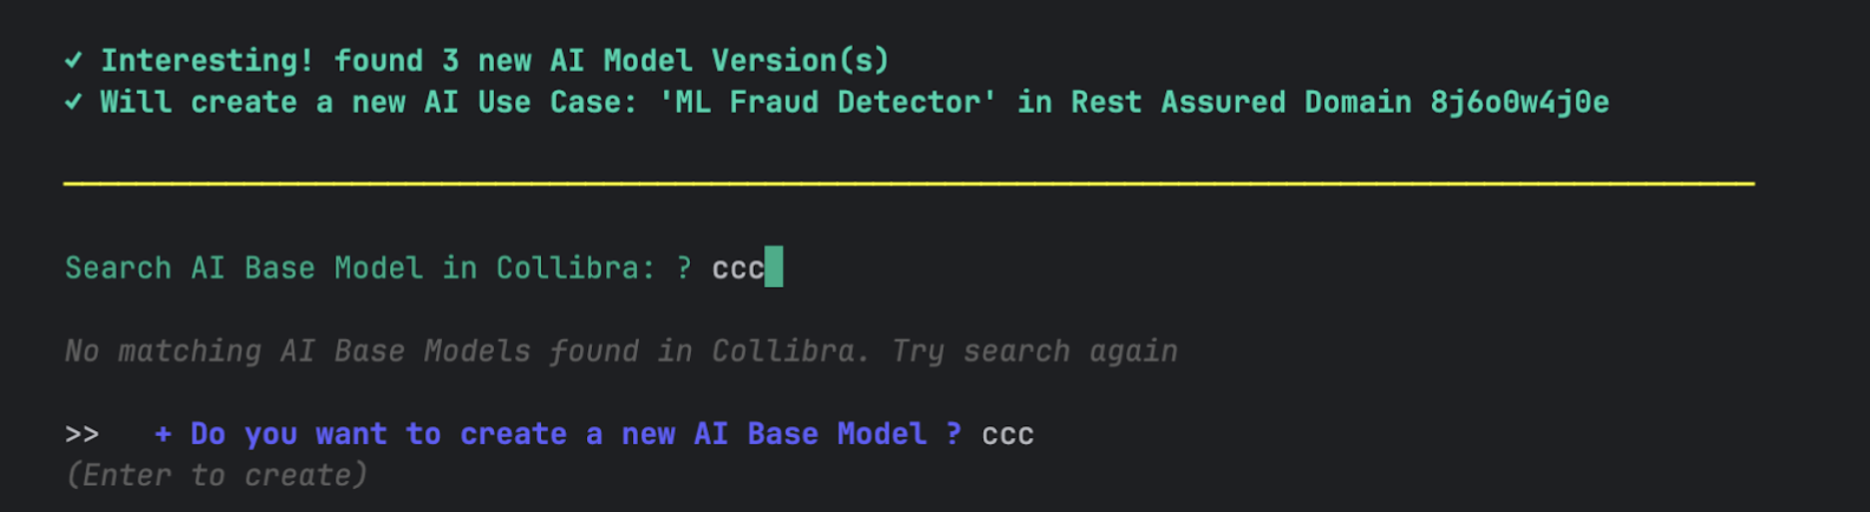
The CLI confirms that a new AI Base Model asset will be created:
Select a domain for the new AI Base Model asset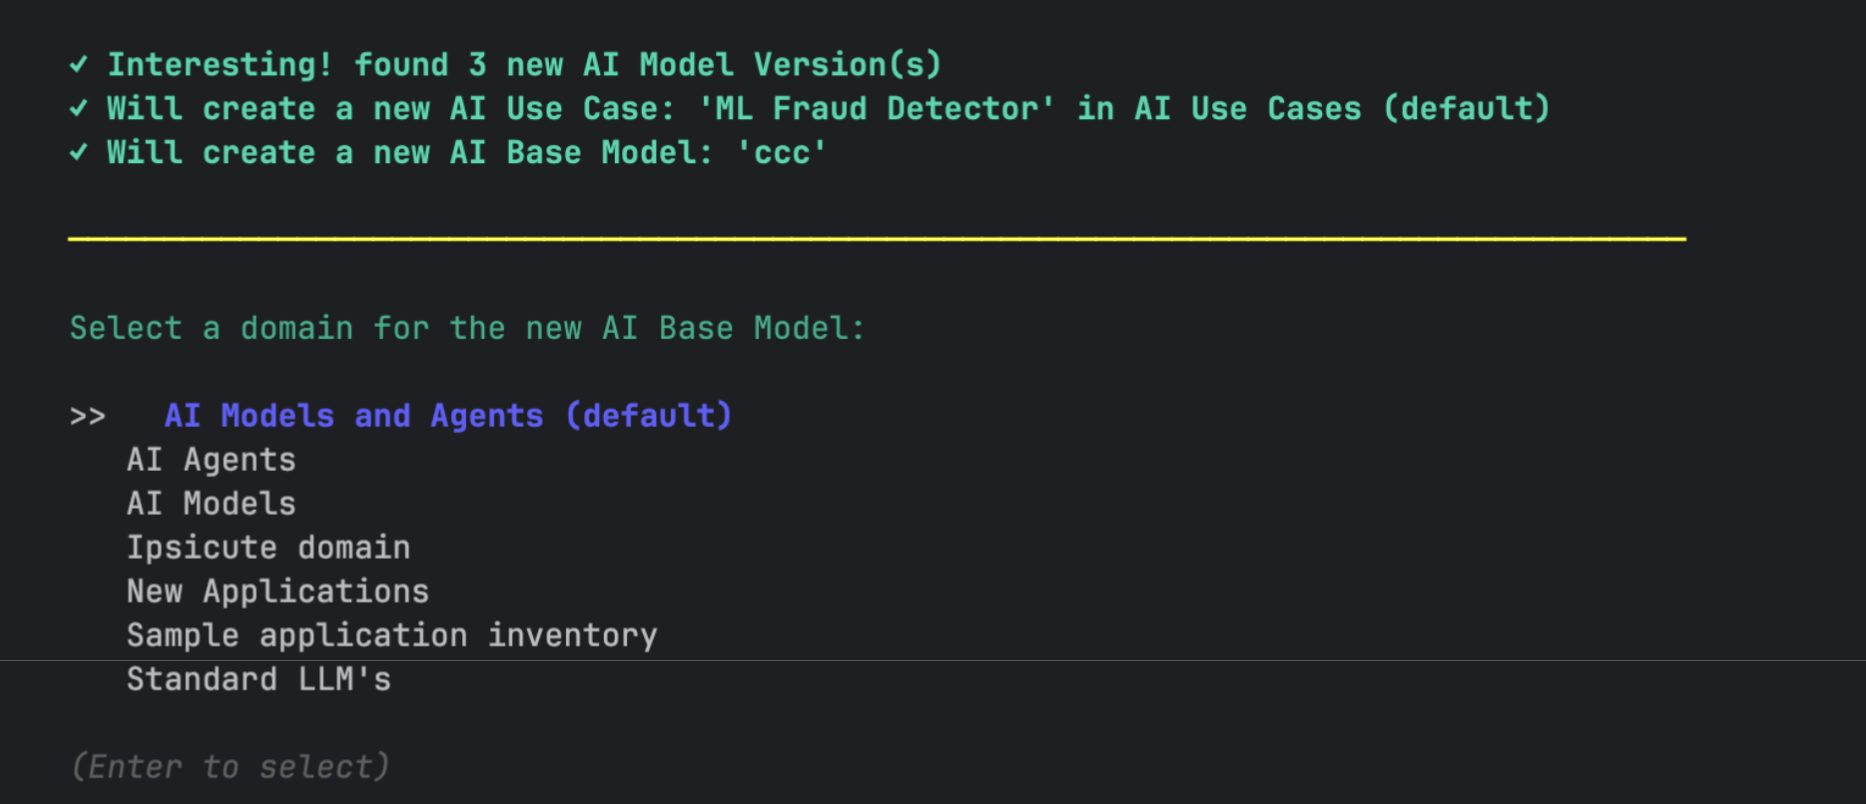
If domains can't be found, choose the default domain.
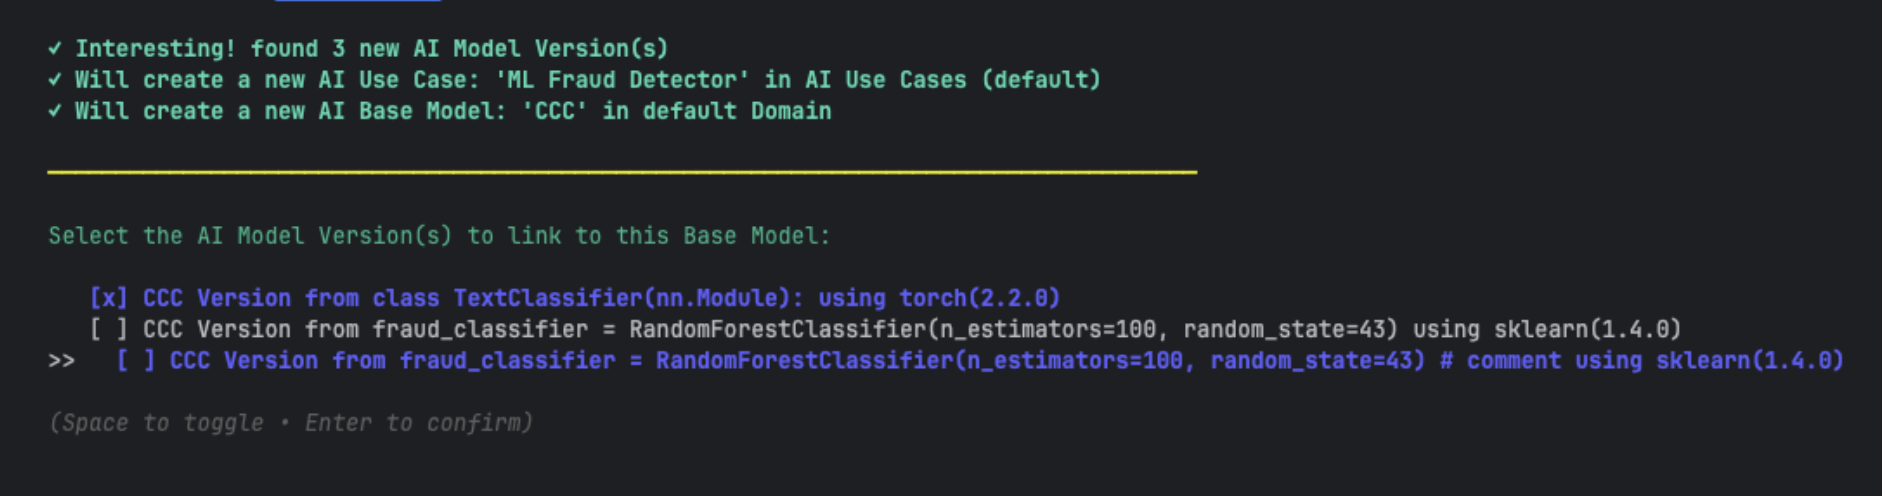
Step 4: Fetching an AI model version
Select one or more AI Model Version assets to link to your selected AI Base Model asset.
A final review screen shows the proposed registration.
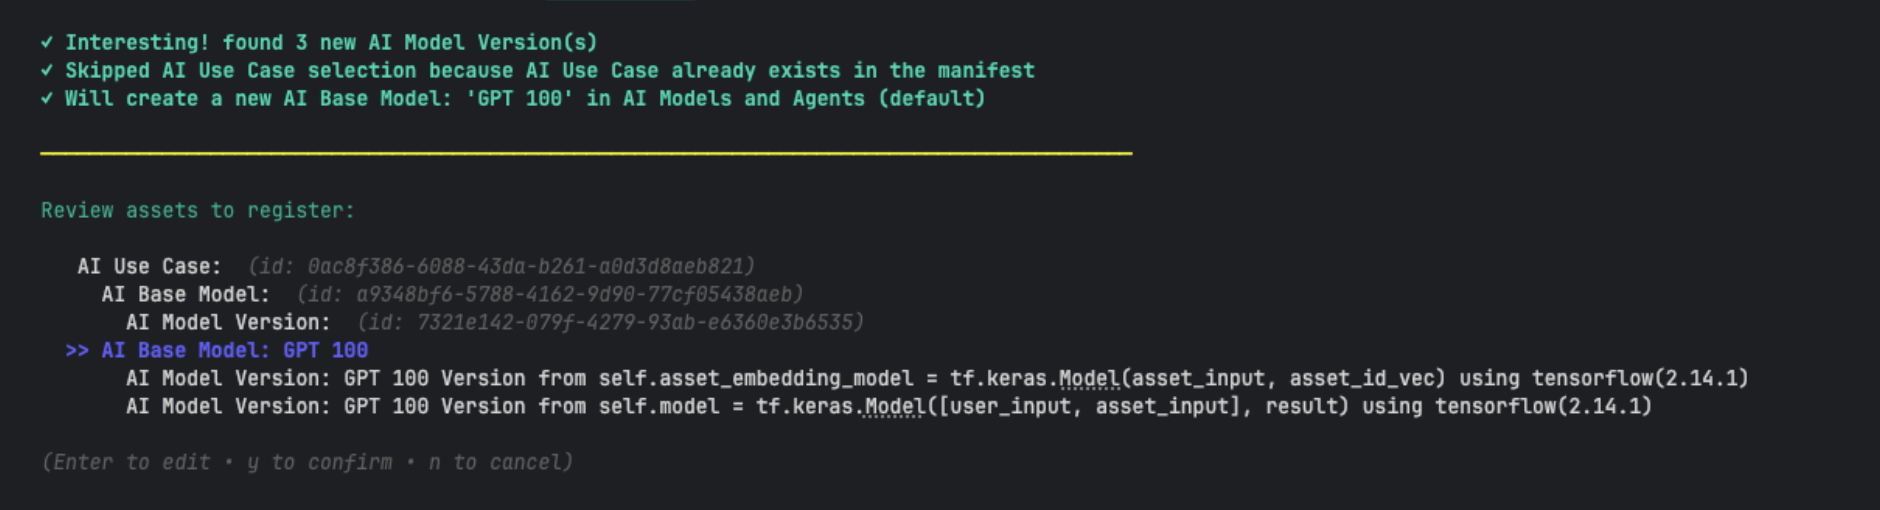
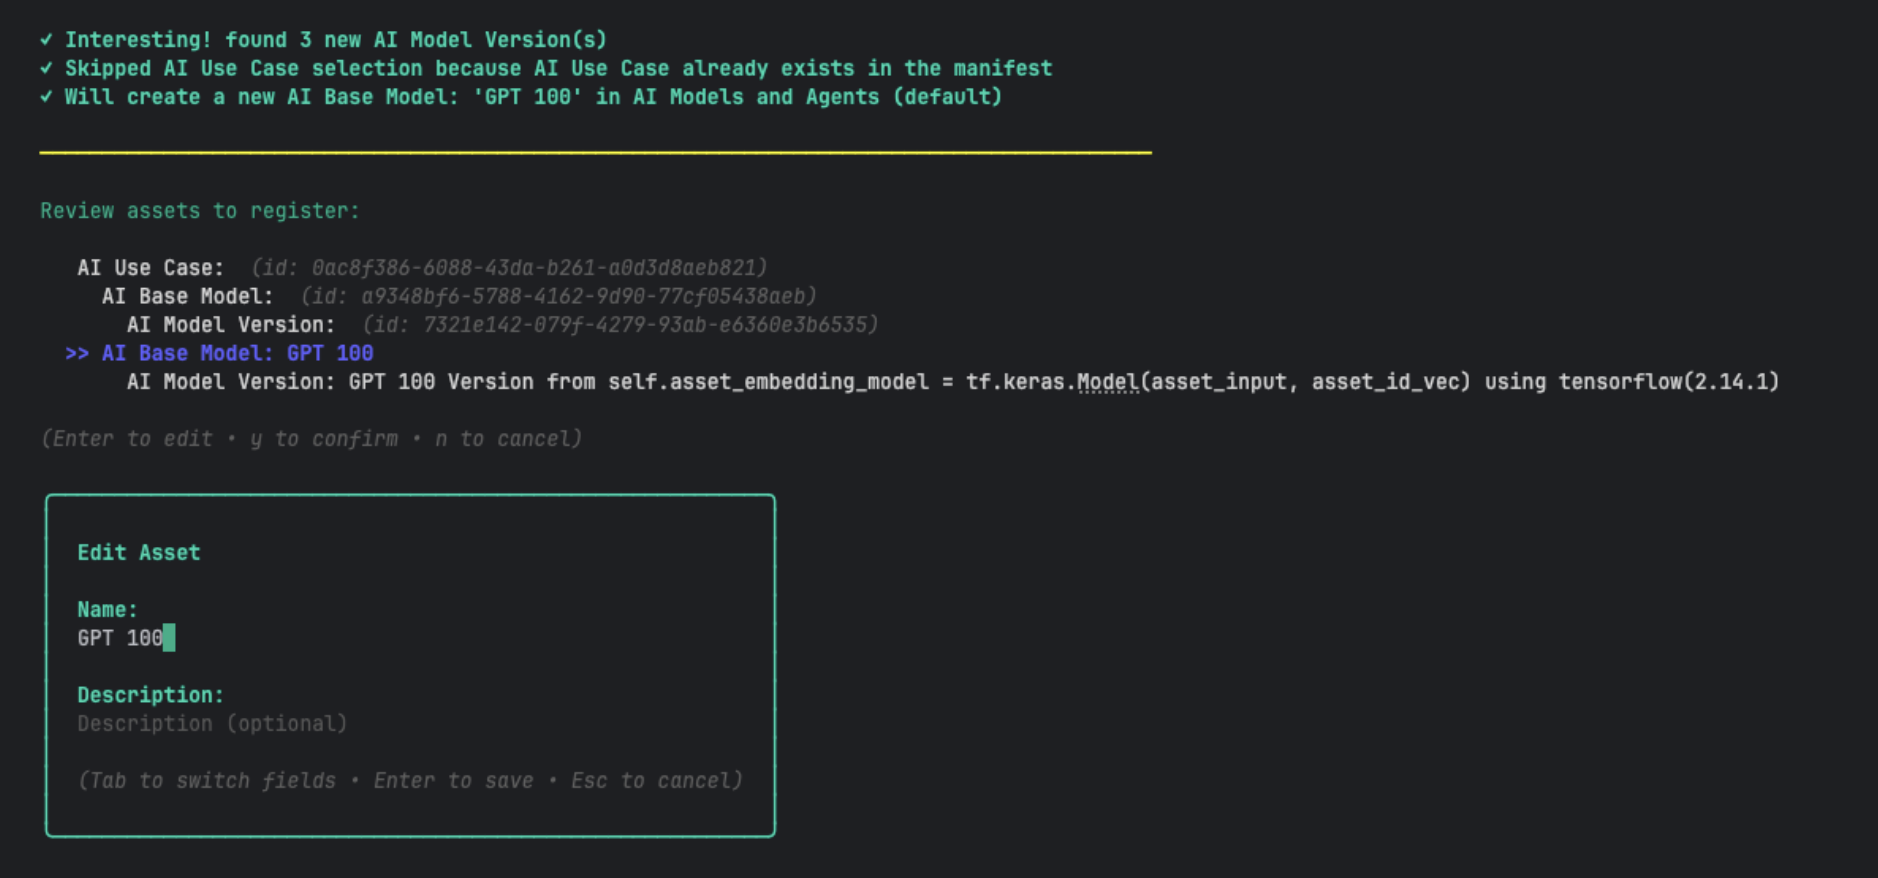
If you want to edit the names and descriptions of the new assets before finalizing the registration, arrow down and press Enter on the asset you want to edit.
Step 5: Finalize
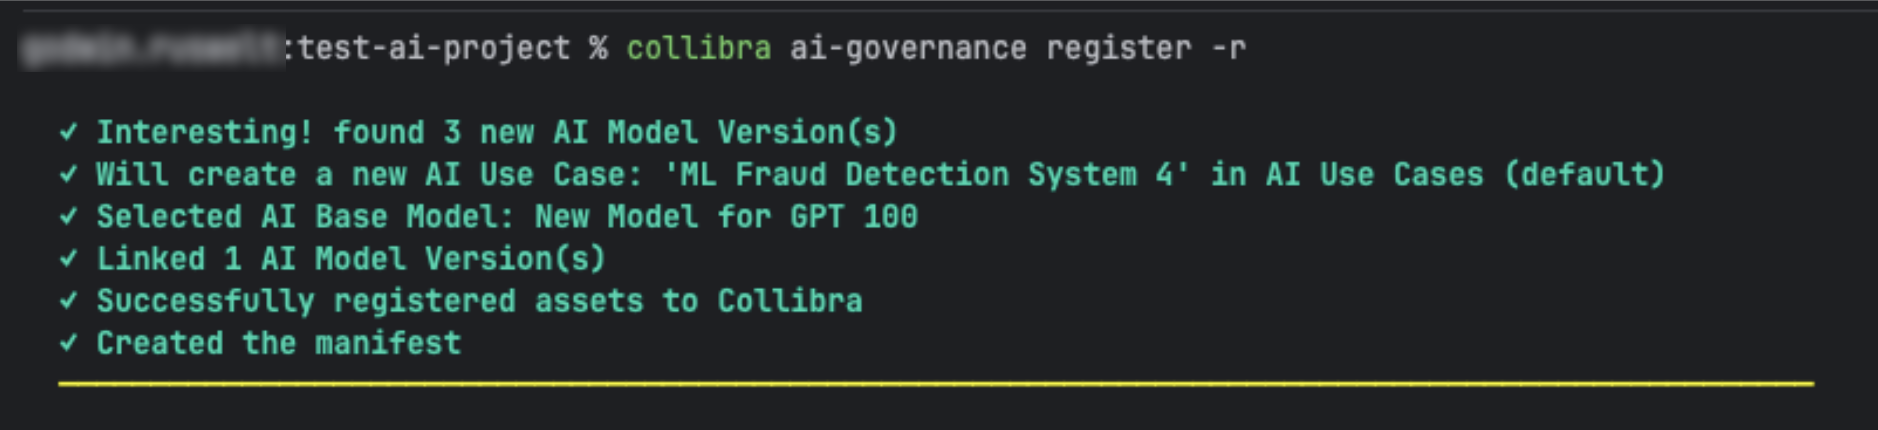
When you enter y to confirm the registration, the CLI imports the assets to Collibra.

If this was a first-time registration, the CLI generates a new collibra.yaml manifest file. If it's not a first-time registration, the CLI updates the existing manifest file.
A successful registration summary is shown.