This section shows you how to map Active Directory (AD) security groups to Data Quality & Observability Classic user roles.
When Active Directory or LDAP is configured, the available groups are based on the settings under the Connections tab of the AD Security page.
Steps
-
Sign in to Data Quality & Observability Classic and click
in the left navigation pane.
- Click Admin Console.
- Click User Management and then click AD Security. The AD and LDAP Security Settings page opens.
- Click the Connections tab and ensure that Active Directory is selected as the Connection Type.
- Click the Mappings tab to display the table of roles and AD groups mapped to them.
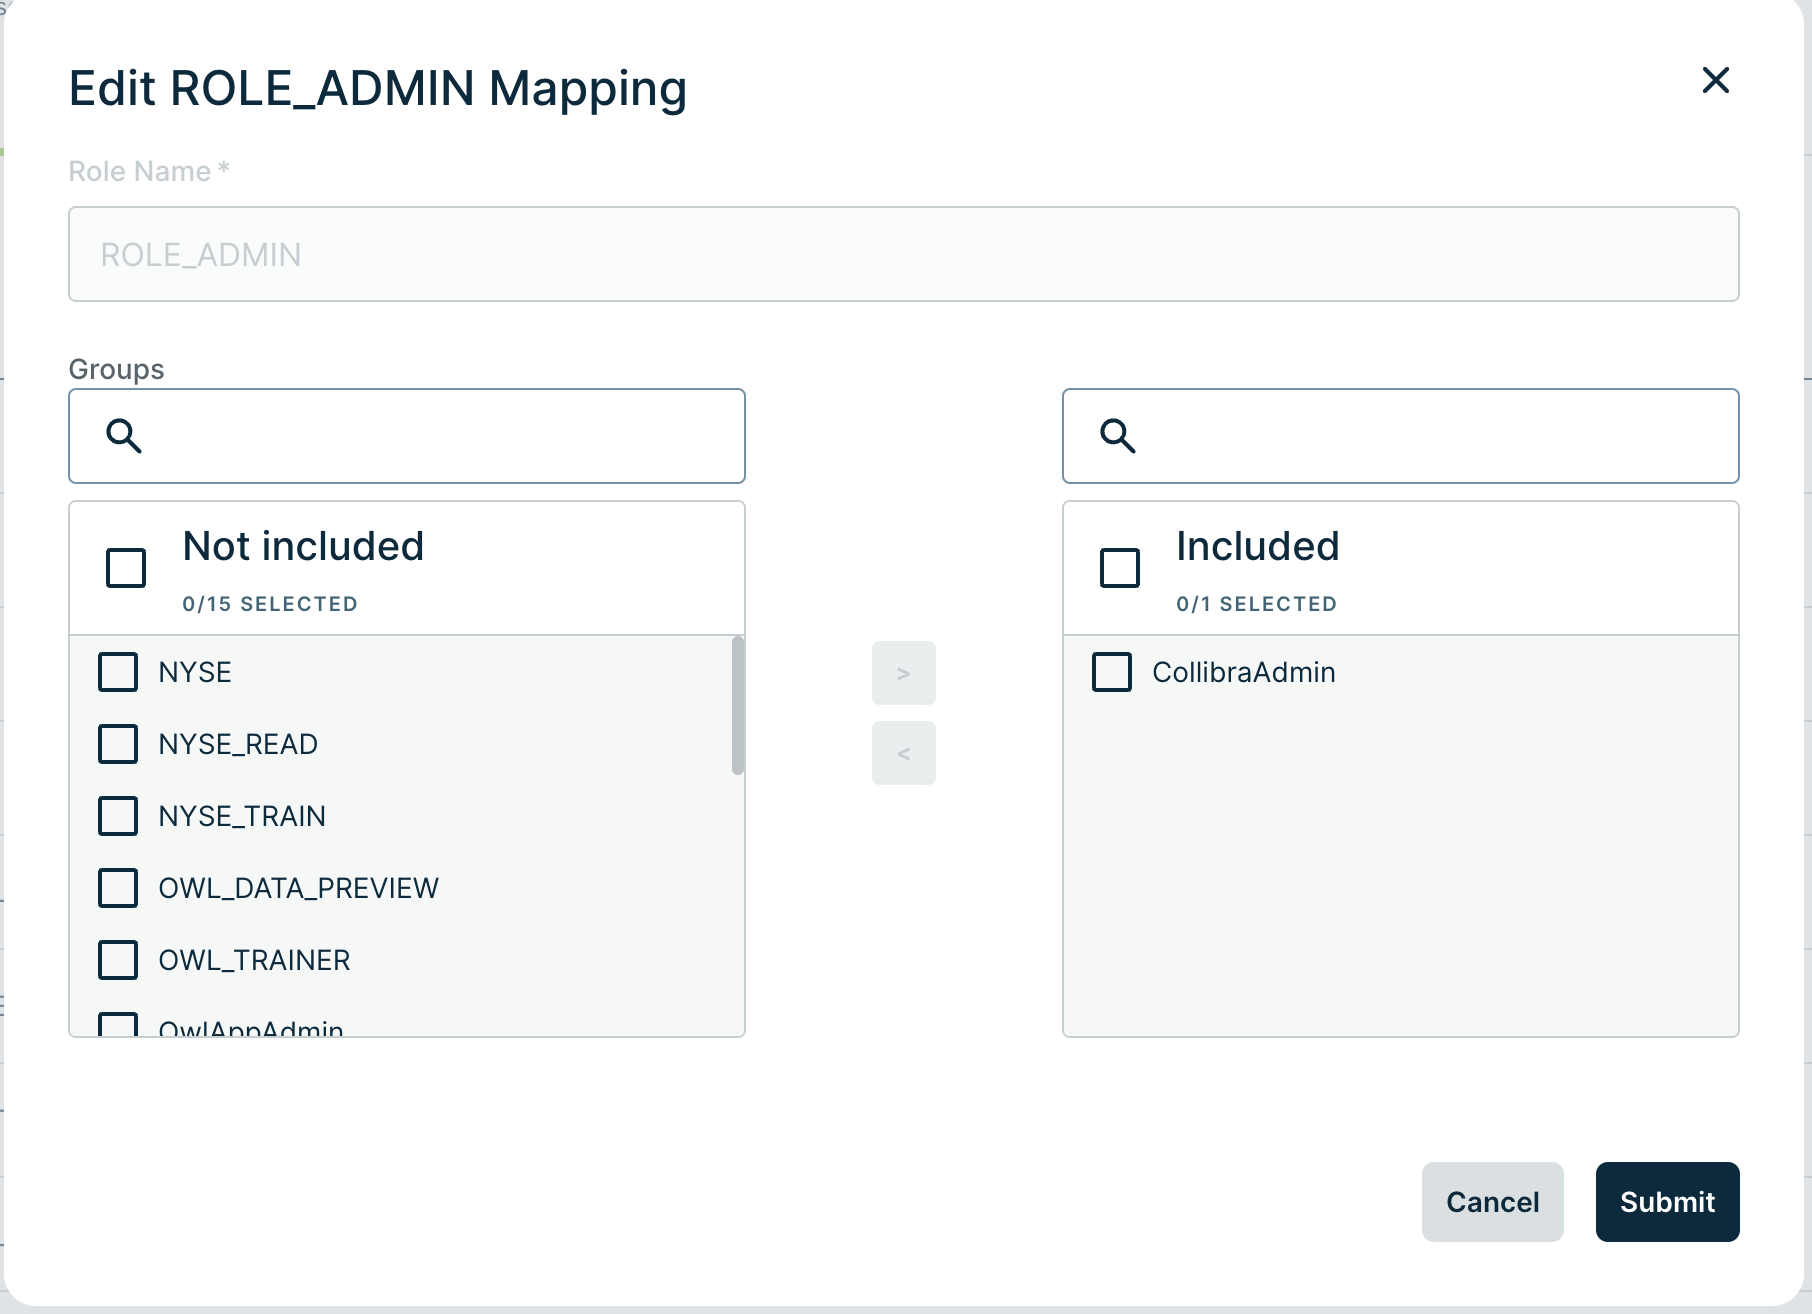
- To map a group to an existing role, find the row containing the role to which you want to map one or multiple AD groups, then click the
 in the Action column. The edit role mapping dialog appears, where you can map AD groups to the selected role.
- Map AD groups to the role by moving them from the Not included box to the Included box. To do this, select the AD group(s) you wish to map to the role, then click the right arrow. You can also filter the AD group in the search fields.
Note To remove a AD group to role mapping, click the left arrow to move the role(s) you select from the Included column back to the Not included column.

- Click Submit.
After successfully mapping an AD group to a role, sign out of Collibra DQ and sign back in as a Domain user.
Note You must restart the Collibra DQ web application by running ./owlmanage.sh restart_owlweb for Standalone or restart the Web Pod for Cloud Native.
When signing into Data Quality & Observability Classic, append the domain to the end of the username.
.png)