Warning We have announced the end of life of Jobserver and all related Jobserver integrations for September 30, 2024, with the exception of Public Sector customers using GovCloud or on-prem environments.
For information on registering a data source via Edge, go to Registering and synchronizing a data source via Edge.
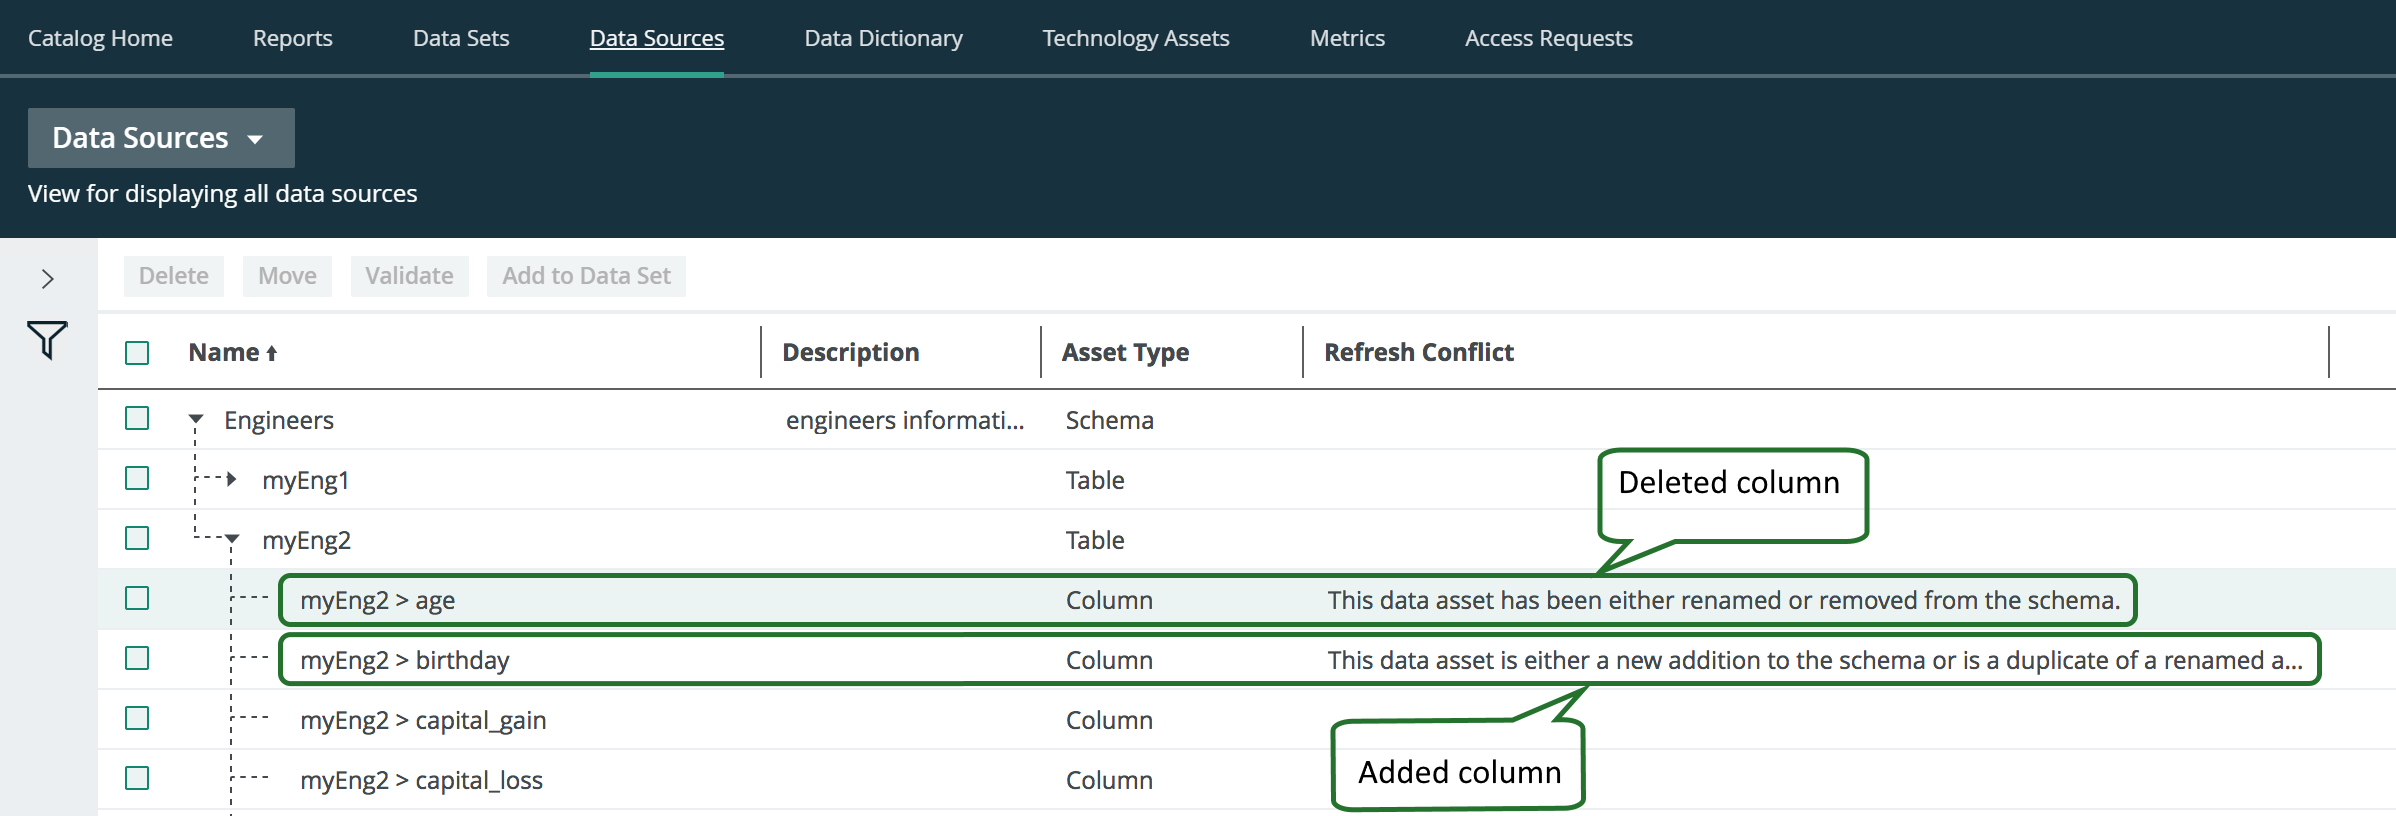
If you refresh a schema, the ingestion process will detect conflicts if the data source has the following changes:
- A column has been removed.
- A column has been added.
In the following example, the ingested schema has a column age and in the updated schema, the column age is removed and a column birthday is added.
In Collibra 2024.02, we've launched a new user interface (UI) in beta for Collibra Data Intelligence Platform! You can learn more about this latest UI in the UI overview.
Use the following options to see the documentation in the latest UI or in the previous, classic UI:
Steps
- Look up the data source with the search function or as follows:
-
On the main toolbar, click
 , and then click
 Catalog.
The Catalog Home opens. - In the submenu, click Data Sources.
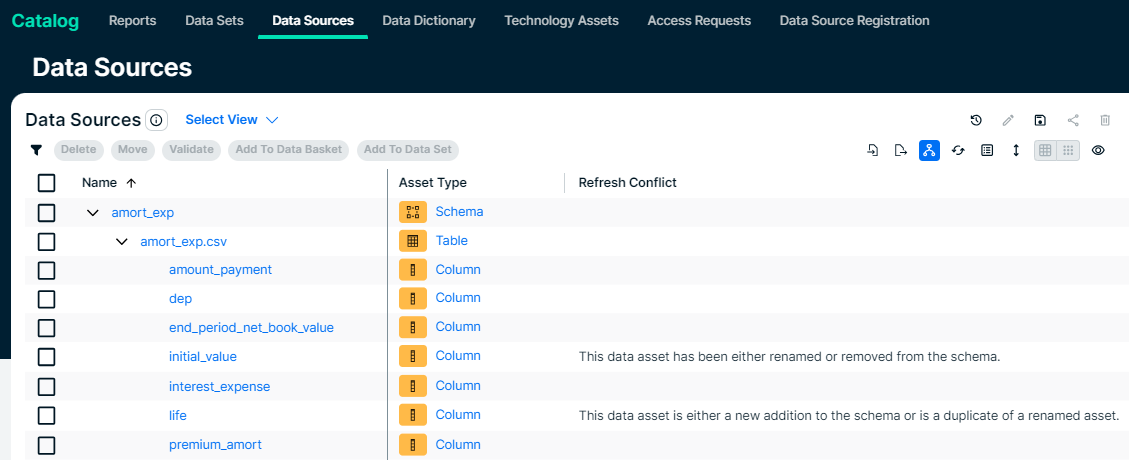
- Optionally, add the Refresh Conflict column to the table.
- In the table, expand the relevant schema and table to find the columns with refresh conflicts.
-
On the main toolbar, click
- Select the column that is removed from the data source and click Delete above the table.
If necessary, select all column assets that are removed from the data source. - Click YesDelete to confirm the deletion of the column asset(s).
- Double click the Refresh Conflict attribute of the new column.
- In the Update Attribute dialog box, click
 .
. - Click Save.
- Click the name of the added column name.
The column asset page appear. - In the Refresh Conflict section of the column asset page, hover over the message and click
 on the right-hand side.
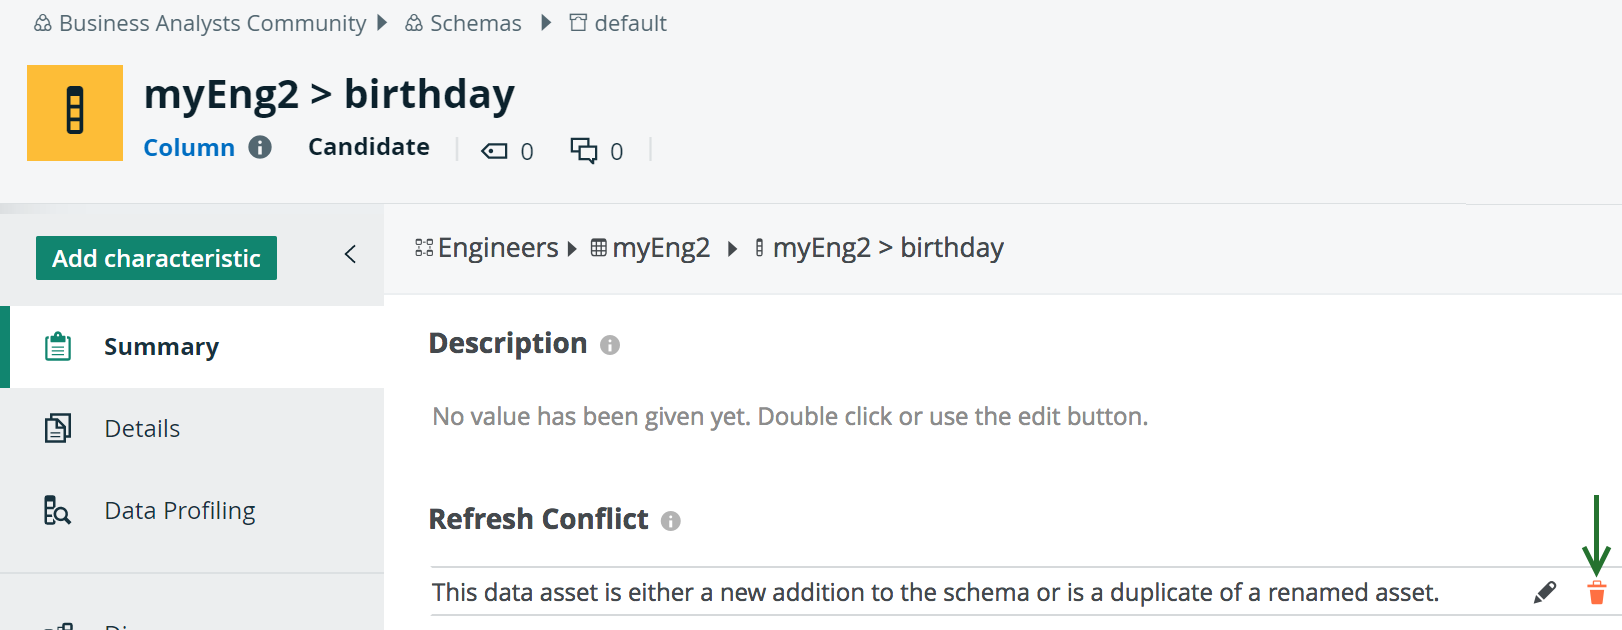
- Click Yes to confirm the deletion of the attribute.
- Click the browser's Back button to return to the Data Sources view of the table.
You can also click on the breadcrumb, as shown in the following image, to open the table asset page of the ingested schema.'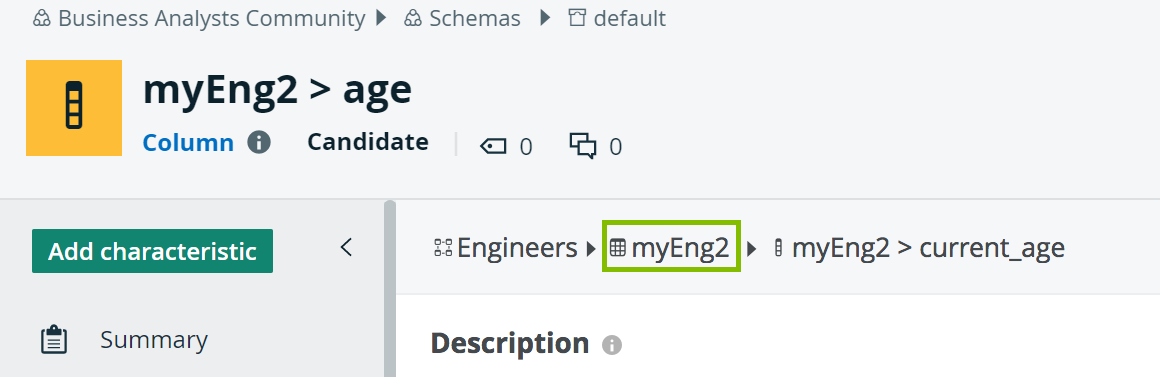
- Repeat steps 5 to 8 for all other added columns.