Create a data access rule
After establishing a primary layer (blanket) of protection to your most sensitive data using standards, create data access rules to manage access to the data sources and enhance protection for specific usages.
Steps
- In Collibra Protect, go to the Data Access Rules tab.
- Click the green Create a Data Access Rule button.
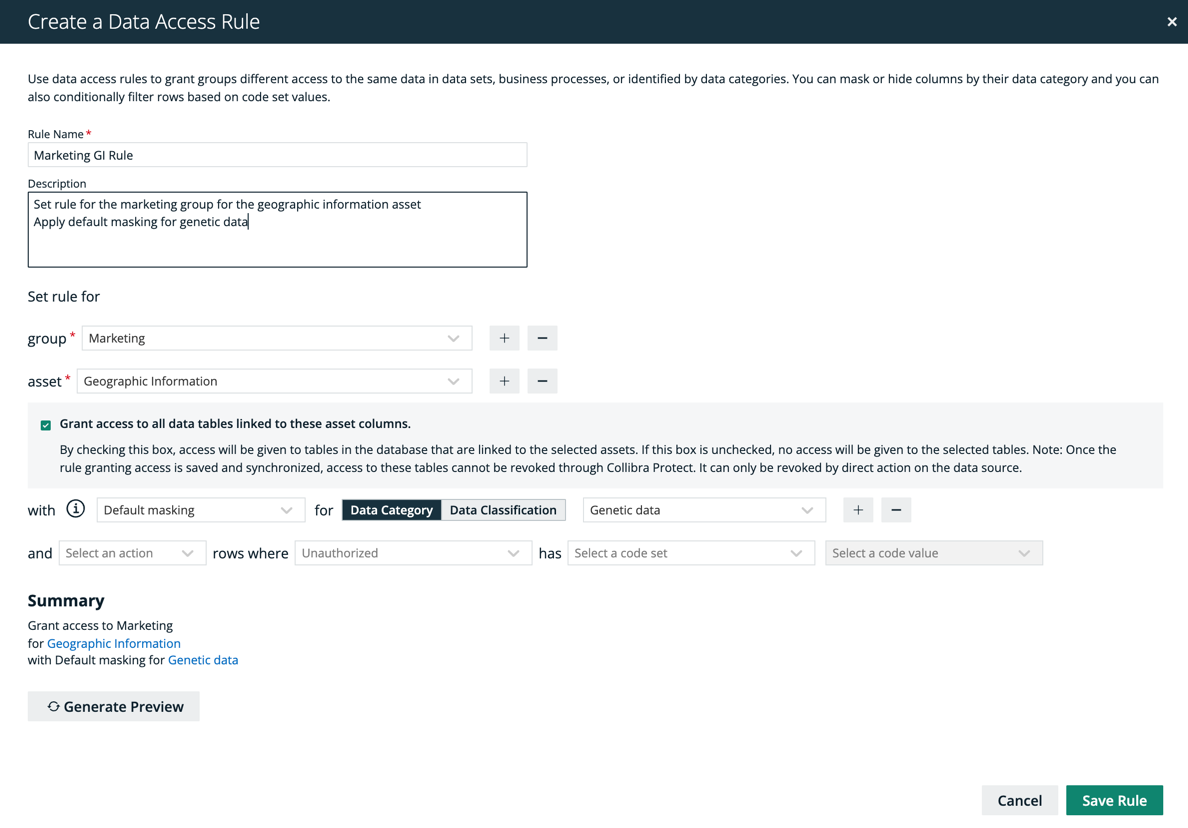
The Create a Data Access Rule dialog box appears. - Enter the required information. It is important to note that when selecting assets, user permissions are defined in Collibra. If an asset is not visible for you, it will not appear as an option in the drop down menus.
Field Description Rule name Name of the rule being created Description (optional)
Description of the rule.
Group Group for which the rule is being created. Asset Name Data asset that the rule is protecting. Collibra Protect enables you to protect the following asset types: Business process, data set, and data category. Learn more in technical background and prescriptive paths. Masking (optional)
Data Category / Data Classification
Masking option for the rule. Click the
 to learn more about masking options.
Select a data category or a data classification to apply masking to.
Action (optional)
Data Classification
Code Set
Code Value
Filter the data by selecting hide or show.
Select data classification that is either hidden or shown
Code set to set up row filtering in the tables. A code set must be selected to filter by a code value.
Code value of the code set selected.
Important The grant access checkbox is selected by default. By leaving this checkbox selected, you are granting access to the tables in the database with columns linked to the selected assets to the selected group(s). If you do not want to grant this kind of access to these groups, clear the grant access checkbox.Note Click the plus sign to add more to each field where applicable. For example, after selecting a group, click
 to add another group into the standard, and click
  to delete a selected group. When entering the required information, you can view the selections you made in the Summary section.
 -
Click Generate Preview to see a preview of the new rule.
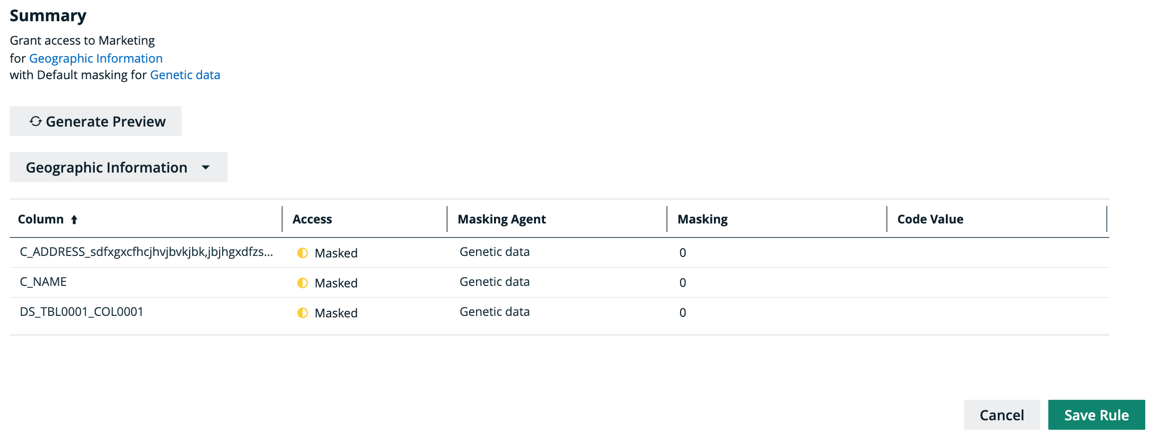 Tip Use the preview to verify the data access rule is set up correctly. The preview only shows the first 1,000 affected columns. The drop-down below the Generate Preview button is used to switch between the different selected assets in the rule. Each asset has its own preview table.
 -
Click the green Save Rule button.
The saved data access rule appears in the rules table.