Set up the Flowable workbench
Open Eclipse IDE and make switch to the Flowable perspective to optimize the workbench for designing diagrams:
- Click the Open Perspective icon
 .
.Note If the Open Perspective icon is not visible, right click on an empty area of the toolbar and select Restore Hidden Toolbar Entries or access the perspectives via the menu: Window → Perspective → Open Perspective → Other.
- In the Open Perspective window, select Flowable and click Open.
- In the Project Explorer window, switch to the Flowable Explorer tab if not already there.
Create a Flowable project
- In the menu bar, select File → New → Other.
- Select Flowable → Flowable Project and click Next.
- Enter a name for the project and click Finish.
The Flowable Explorer in the is populated with the project files.
Create a Flowable diagram
- In the Flowable Explorer tab, select the project and go to src → main → resources → diagrams.
- In the Flowable Explorer tab, right click and select New → Other.
- Select Flowable → Flowable Diagram and click Next.
- Enter a name for the diagram file and click Finish.
The shared area displays the empty diagram and a Palette.
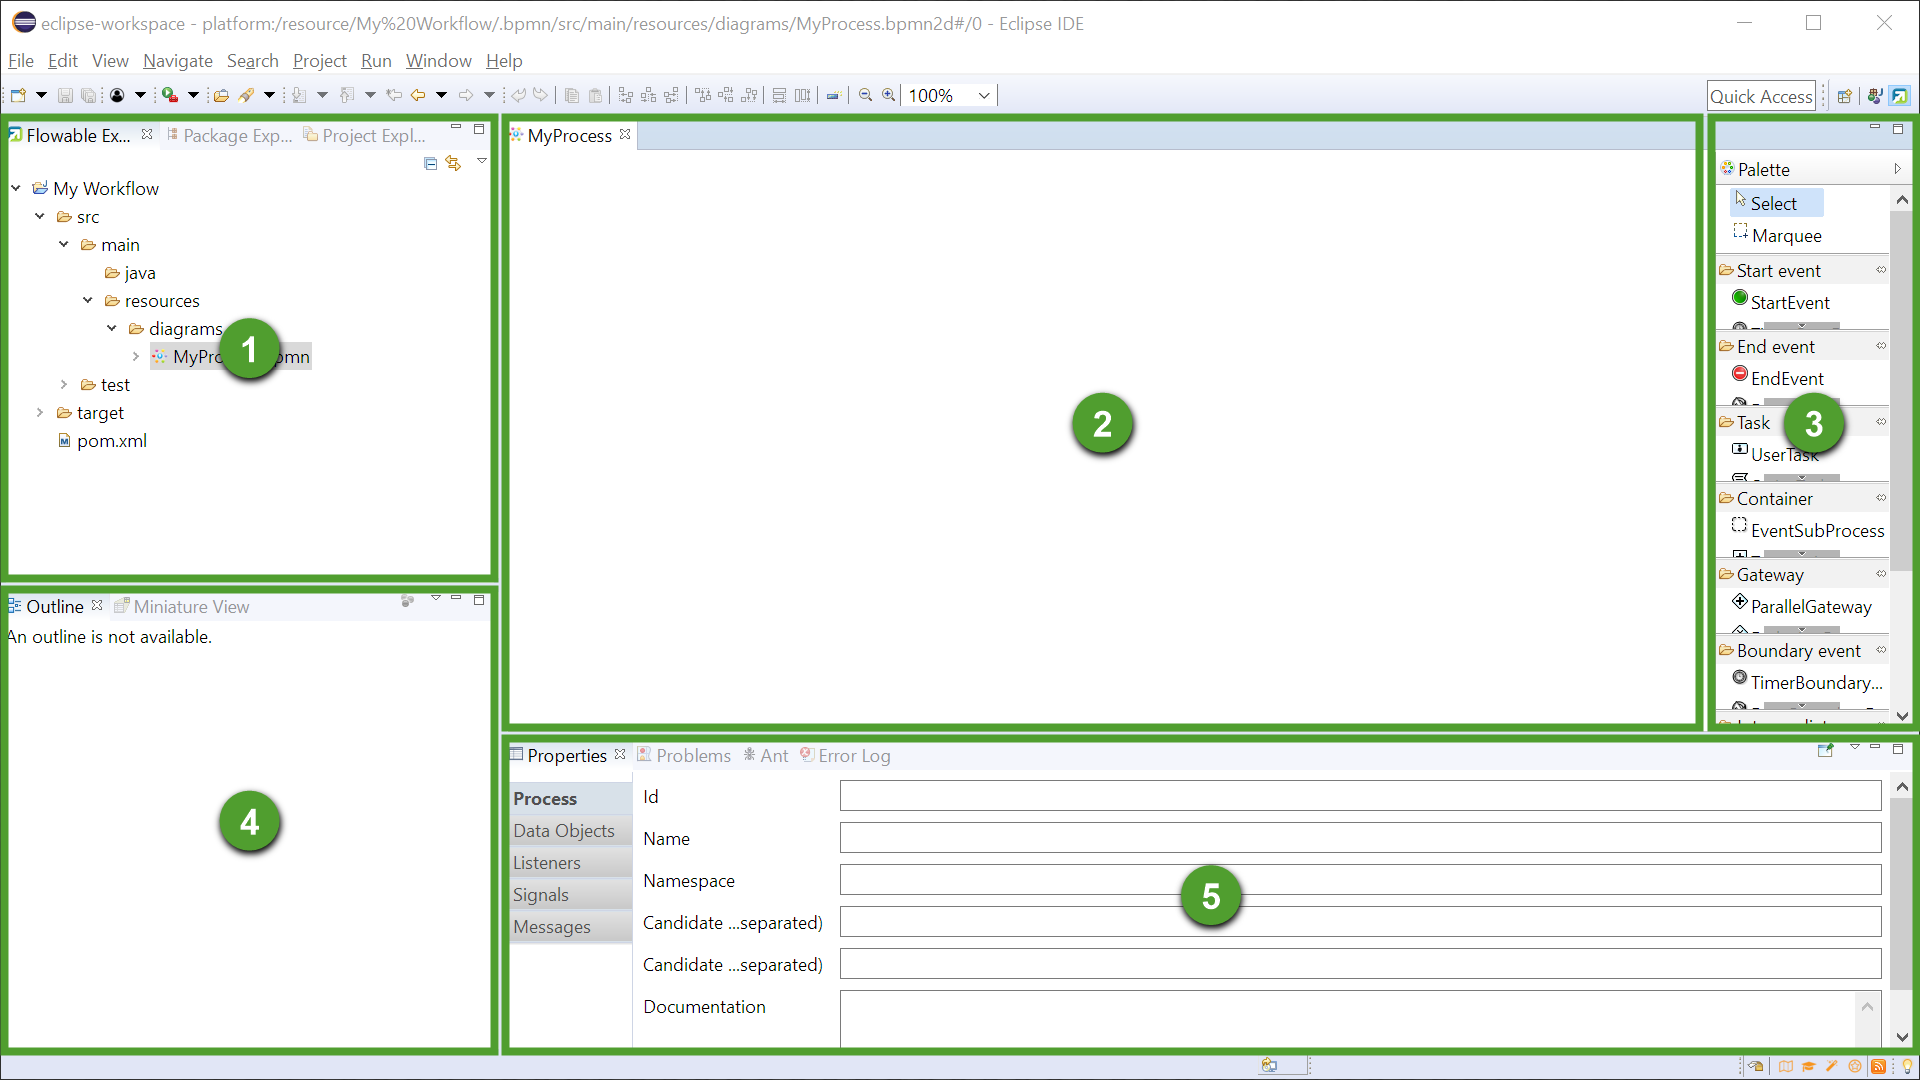
|
Element |
Name |
Description |
|---|---|---|
|
1 |
Flowable Explorer |
A tree list display of files and folders associated with the current project. |
|
2 |
Shared Area - Diagram |
When a diagram is selected the left part is displaying the visual representation of the diagram. |
|
3 |
Shared Area - Palette |
When a diagram is selected the right part is displaying a list of diagram tools and components. |
|
4 |
Outline |
The outline of a selected structured file and its elements. |
|
5 |
Properties |
The property fields of the selected diagram component. |